
Selecting an aircraft is only the beginning. The target detail panel turns a highlighted symbol into a useful traffic picture by combining identity, position, movement, aircraft-reported values, and data quality.
Use this guide after AO Guide: Search and Select Aircraft. It focuses on the fields that help you understand one target without trying to memorize every value in the panel.
Start with the whole traffic picture
When you select an aircraft, AO highlights the target and opens its detail panel automatically.
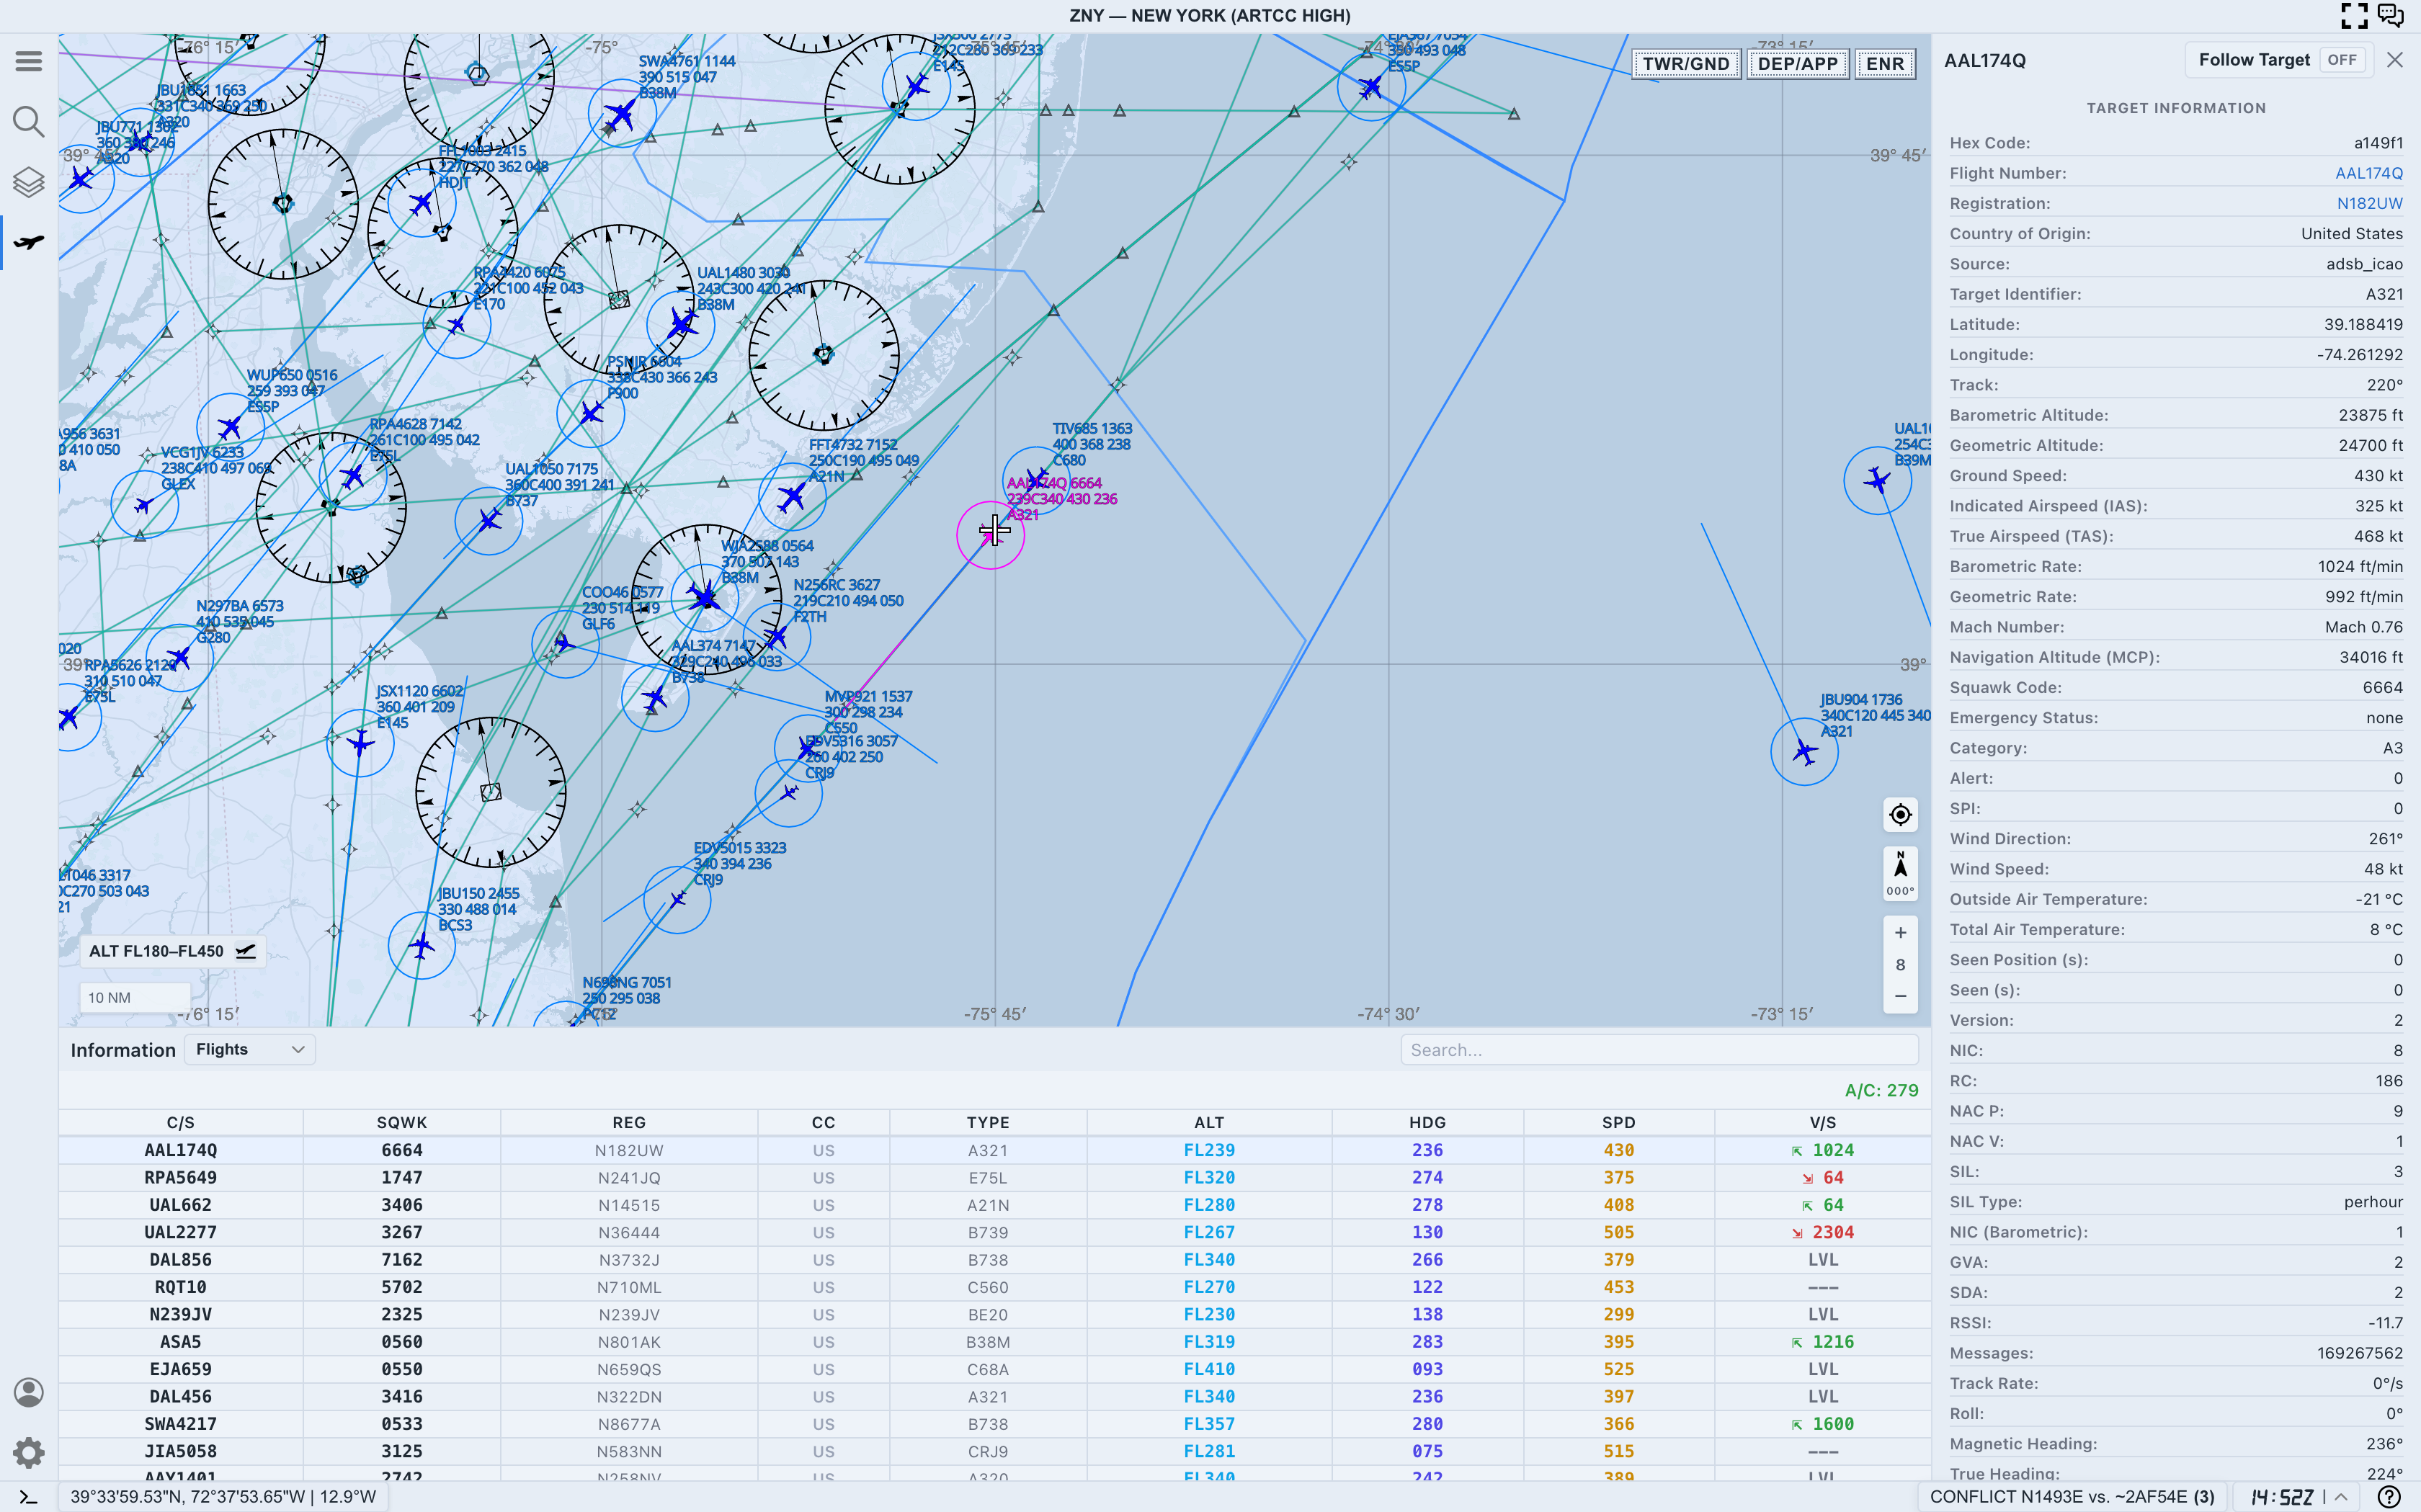
Read the workspace in three connected parts:
- The selected map symbol shows where the aircraft is relative to surrounding traffic and airspace.
- The right-side detail panel describes the selected aircraft.
- The bottom
Flightstable makes it easier to compare the target with nearby traffic.
The values update continuously while the aircraft remains live. Small differences between the map label, table, and screenshots are normal when the feed updates between observations.
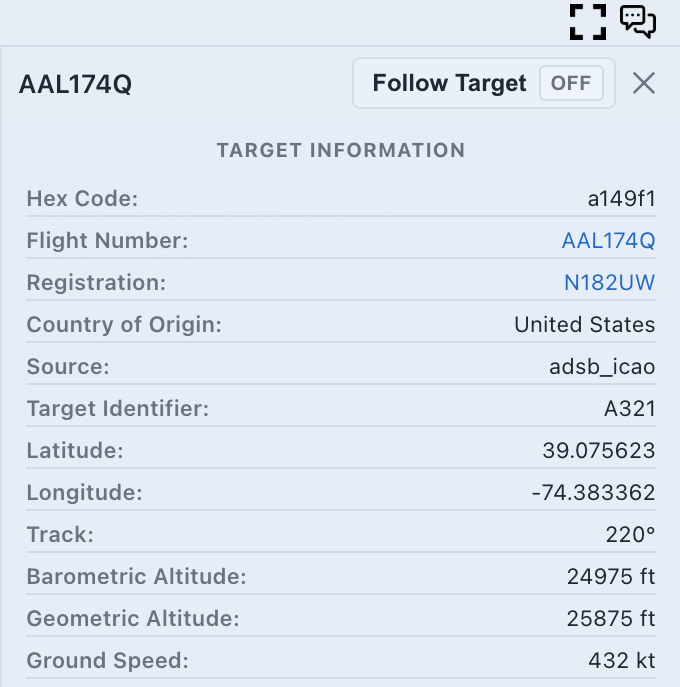
Step 1. Confirm the aircraft identity
Before interpreting motion or altitude, make sure the detail panel belongs to the aircraft you intended to select.
Start with:
Flight Number: the active callsign or flight identifierHex Code: the aircraft’s ICAO 24-bit identityRegistration: the aircraft registration when availableCountry of Origin: the country associated with the identity recordSource: the source category for the traffic recordTarget Identifier: the reported aircraft type or target designator
Calls signs can change or disappear during a flight. The hex code and registration provide stronger identity checks when you need to distinguish similar targets.
Step 2. Read position and direction
The next group tells you where the aircraft is and where it is moving:
LatitudeandLongitude: the reported positionTrack: the direction the aircraft is moving across the groundGround Speed: movement speed relative to the ground
Track is not always the same as the aircraft’s heading. Wind can cause the aircraft nose and ground path to point in different directions.
Use the map to validate the numbers. The target trail and symbol movement should make sense beside the reported track and speed.
Step 3. Compare altitude values
AO may show more than one altitude source:
Barometric Altitude: pressure-derived altitude commonly used for traffic separation and flight-level contextGeometric Altitude: position-derived altitude reported through the surveillance feedNavigation Altitude (MCP): selected or reported navigation altitude when available
Barometric and geometric altitude do not need to match exactly. Weather, pressure reference, sensor source, and reporting methods can produce a difference.
Use barometric altitude as the primary quick read, then compare the other values when the difference matters to your task.
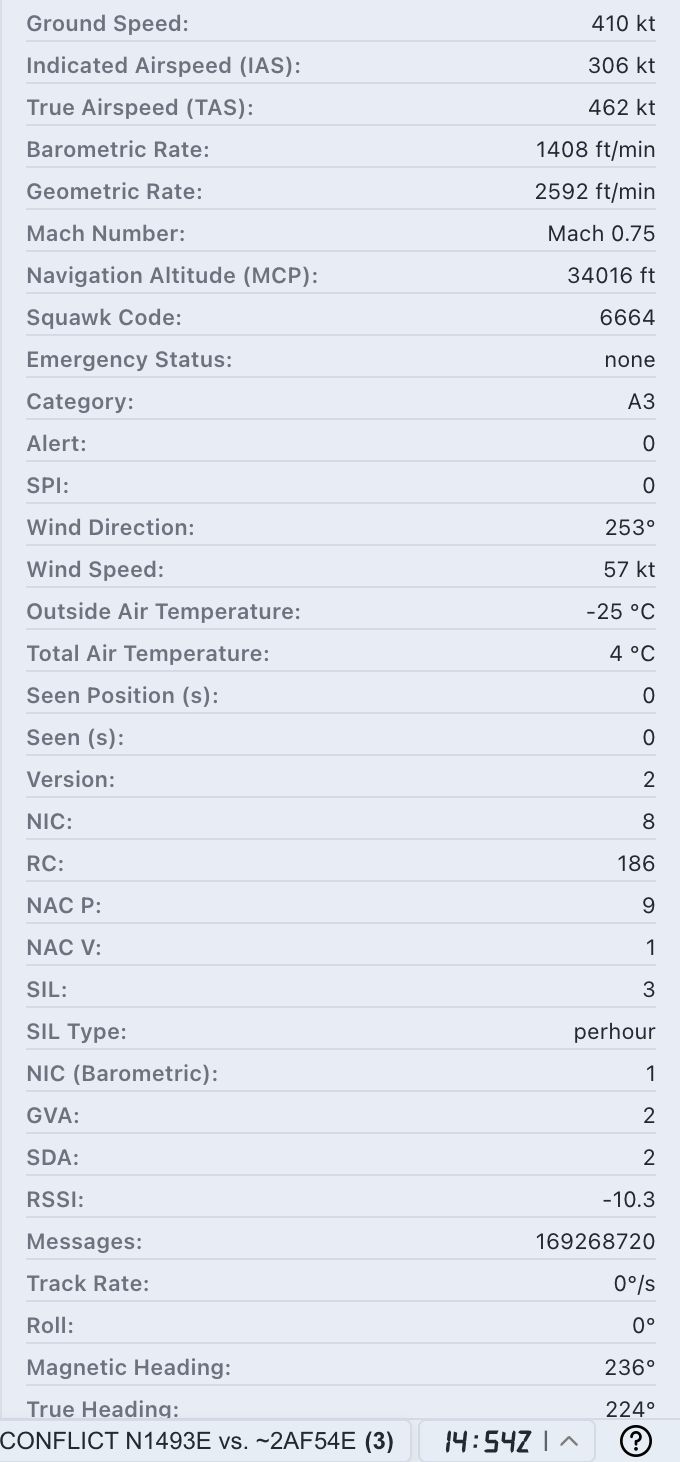
Step 4. Understand speed and vertical movement
The middle of the panel adds aircraft performance and trend information.
Key fields include:
Ground Speed: speed across the groundIndicated Airspeed (IAS): airspeed based on sensed dynamic pressureTrue Airspeed (TAS): airspeed corrected for atmospheric conditionsMach Number: speed expressed relative to the local speed of soundBarometric Rate: climb or descent rate derived from barometric altitudeGeometric Rate: climb or descent rate derived from geometric altitude
A positive vertical rate indicates a climb; a negative rate indicates a descent. Do not rely on one update alone. Watch the value over several updates and compare it with the map label and V/S column in the flights table.
Step 5. Check squawk and emergency state
Use these fields as operational status indicators:
Squawk Code: the aircraft’s assigned transponder codeEmergency Status: emergency state reported by the feedAlertandSPI: additional surveillance status flags
An unusual squawk or emergency value deserves attention, but it should still be interpreted with the rest of the live traffic context. AO presents surveillance data; it does not replace authoritative ATC information.
Step 6. Check freshness and signal context
Before trusting a precise position or trend, check whether the data is current:
Seen Position (s): age of the latest position updateSeen (s): age of the latest message from the targetMessages: cumulative messages associated with the recordRSSI: received signal strength indicator supplied by the source
Values near zero for Seen Position and Seen indicate a recent update. As these values increase, treat the target position and motion as progressively less current.
Message count and RSSI can provide context, but they are not simple accuracy scores. Freshness, source, movement consistency, and surrounding traffic should be considered together.
Step 7. Use heading and turn fields carefully
The lower panel may include:
Track Rate: rate of change in the ground trackRoll: reported bank angleMagnetic Heading: aircraft heading relative to magnetic northTrue Heading: aircraft heading relative to true north
These fields help explain turns and the difference between where an aircraft points and where it travels. Availability and update quality vary by aircraft and source, so missing or steady values are not automatically errors.
A practical reading order
When you need a quick target assessment, use this order:
- Confirm
Flight Number, hex code, and registration. - Check
Seen PositionandSeenfor freshness. - Read barometric altitude, ground speed, and track.
- Check barometric rate to identify climb, level flight, or descent.
- Review squawk and emergency state.
- Compare the aircraft with its map position and flights-table row.
This order prevents a precise-looking number from distracting you before identity and freshness are established.
Next step
After you can read one target confidently, continue with AO Guide: Measuring Traffic with Range Calc Mode to measure distance and vertical difference between selected aircraft.