
Target preferences control how aircraft are drawn on the map. They do not change the traffic feed, selected aircraft, altitude filter, or workspace mode. They change how much information each target carries into the visible picture.
Use this guide after AO Guide: Working with Altitude Filters. Altitude filters decide which aircraft are visible. Target preferences decide how readable those visible aircraft are.
In this guide, you will learn how to:
- open
Target Preferences - adjust symbol size and target shape
- choose a data block format
- use trails and future path lines
- use separation circles without overcrowding the map
- tune motion behavior for your reading style
- use live preview before applying changes
Step 1. Open Target Preferences
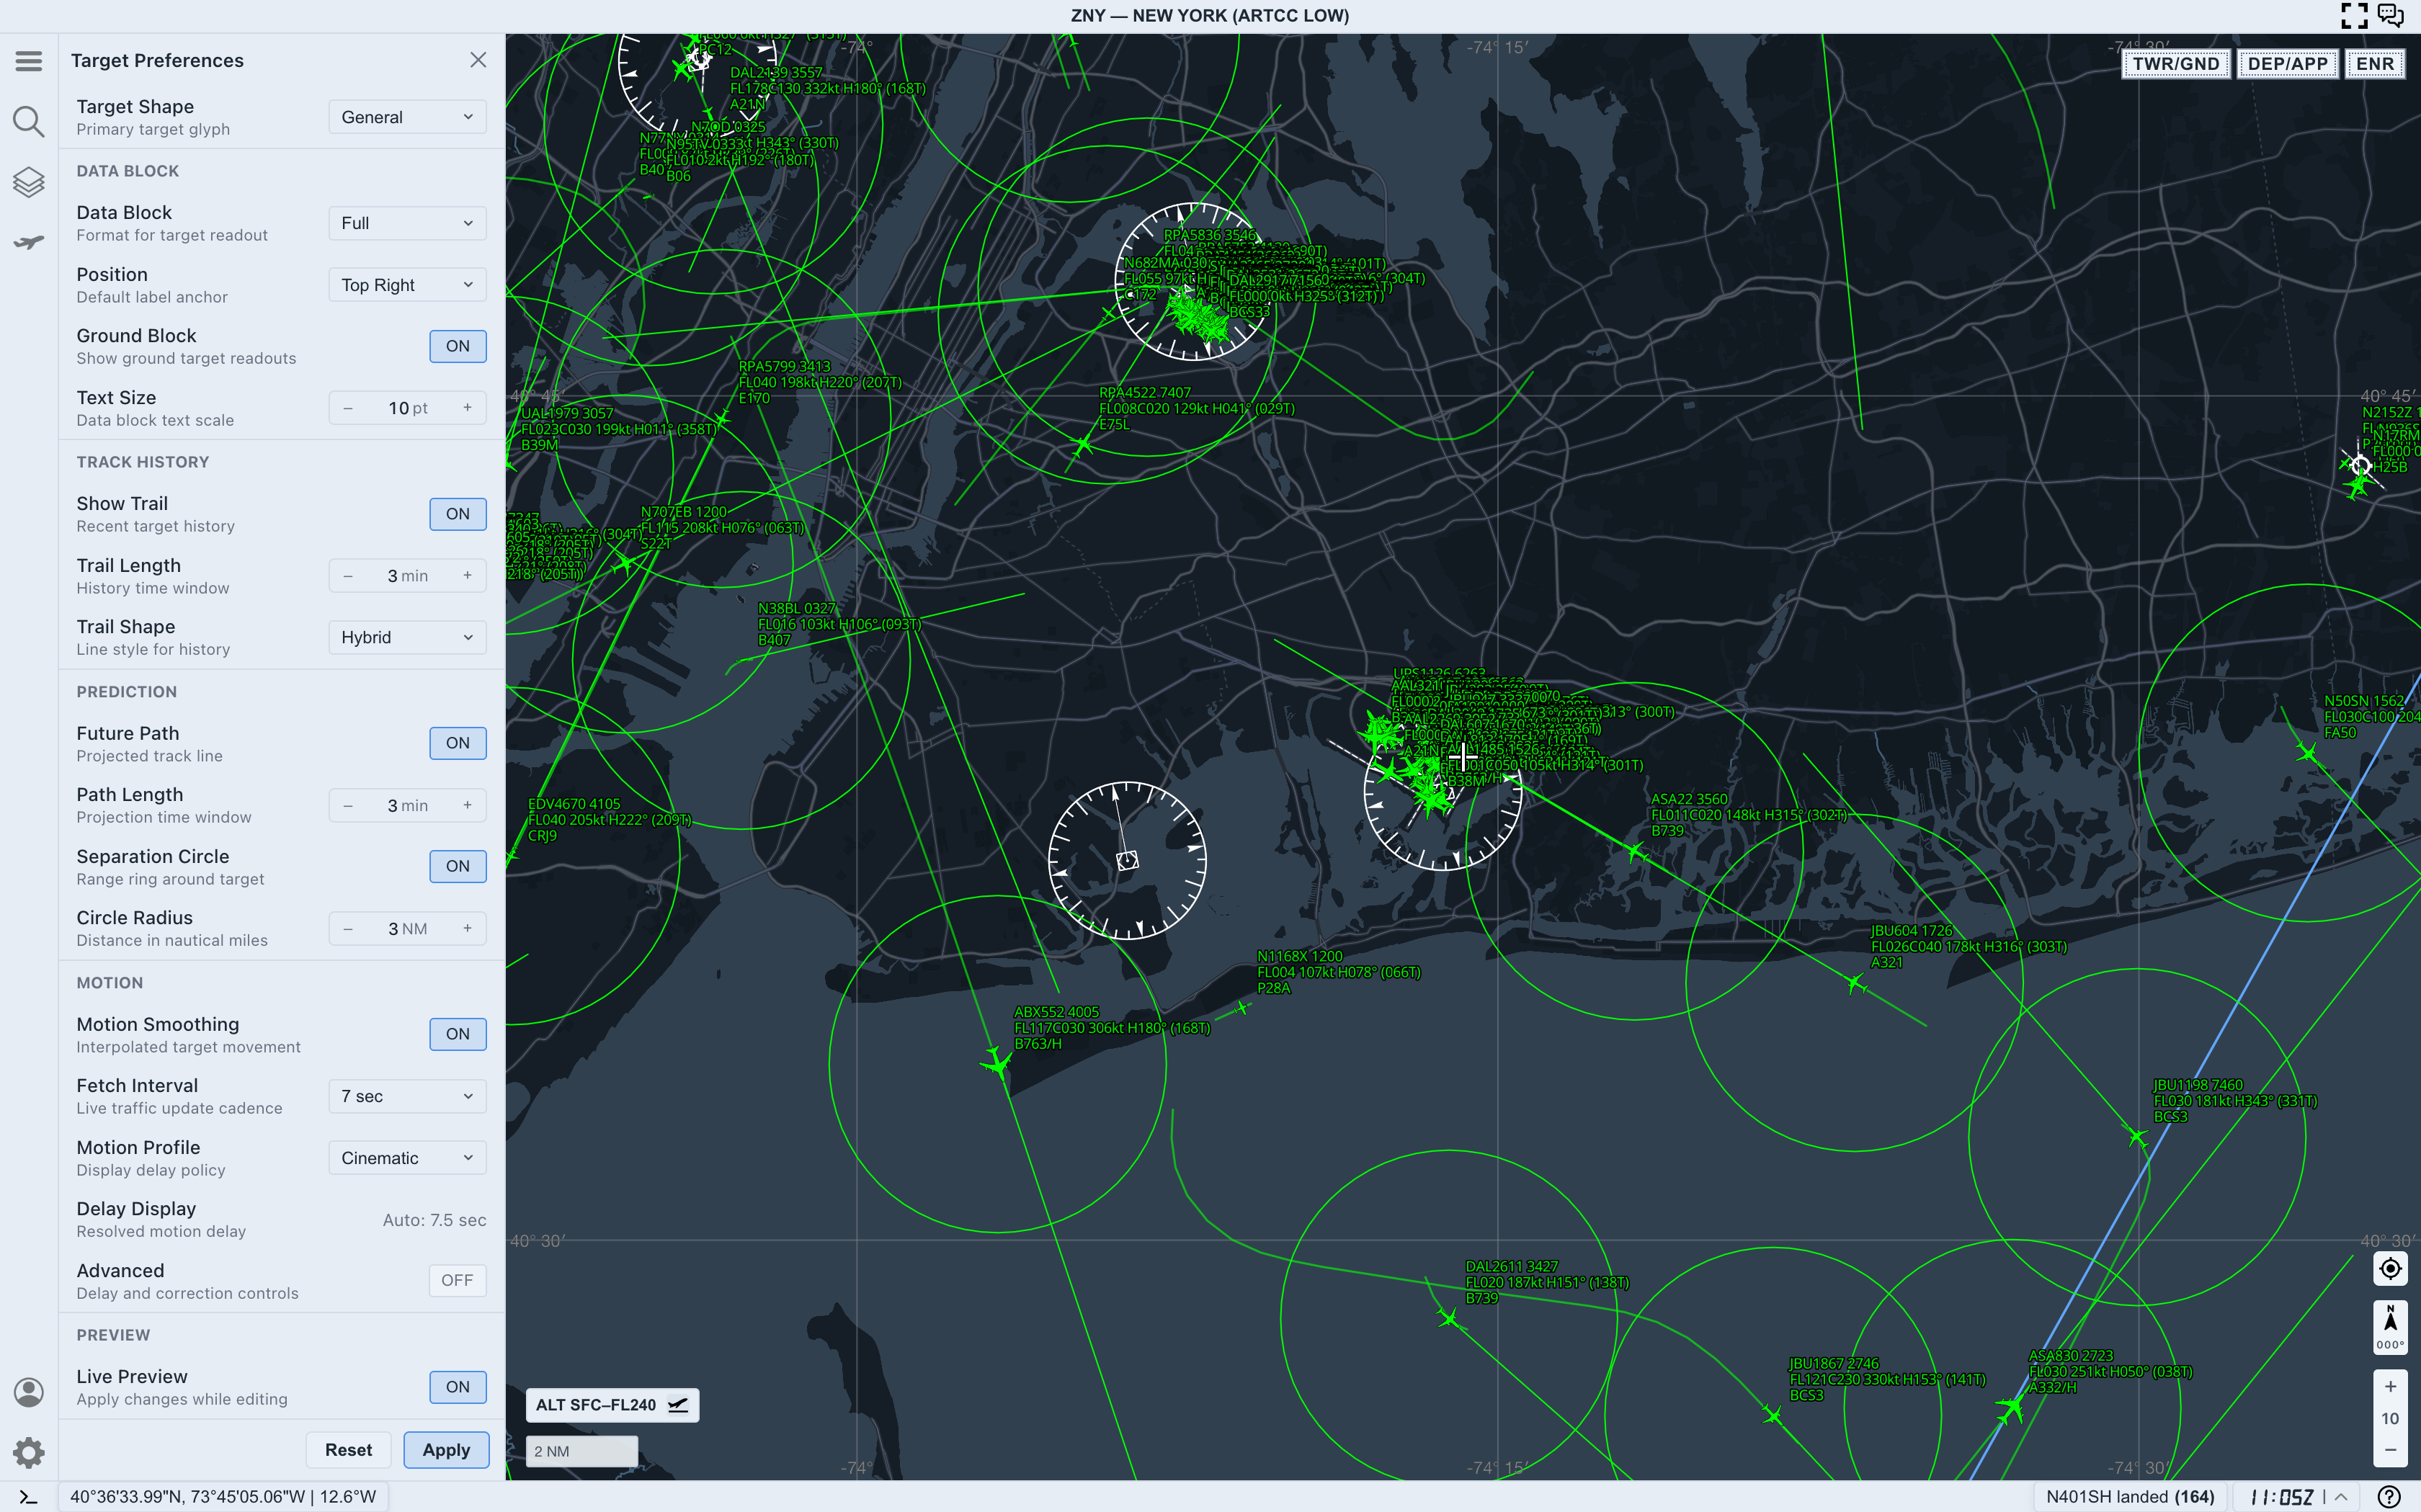
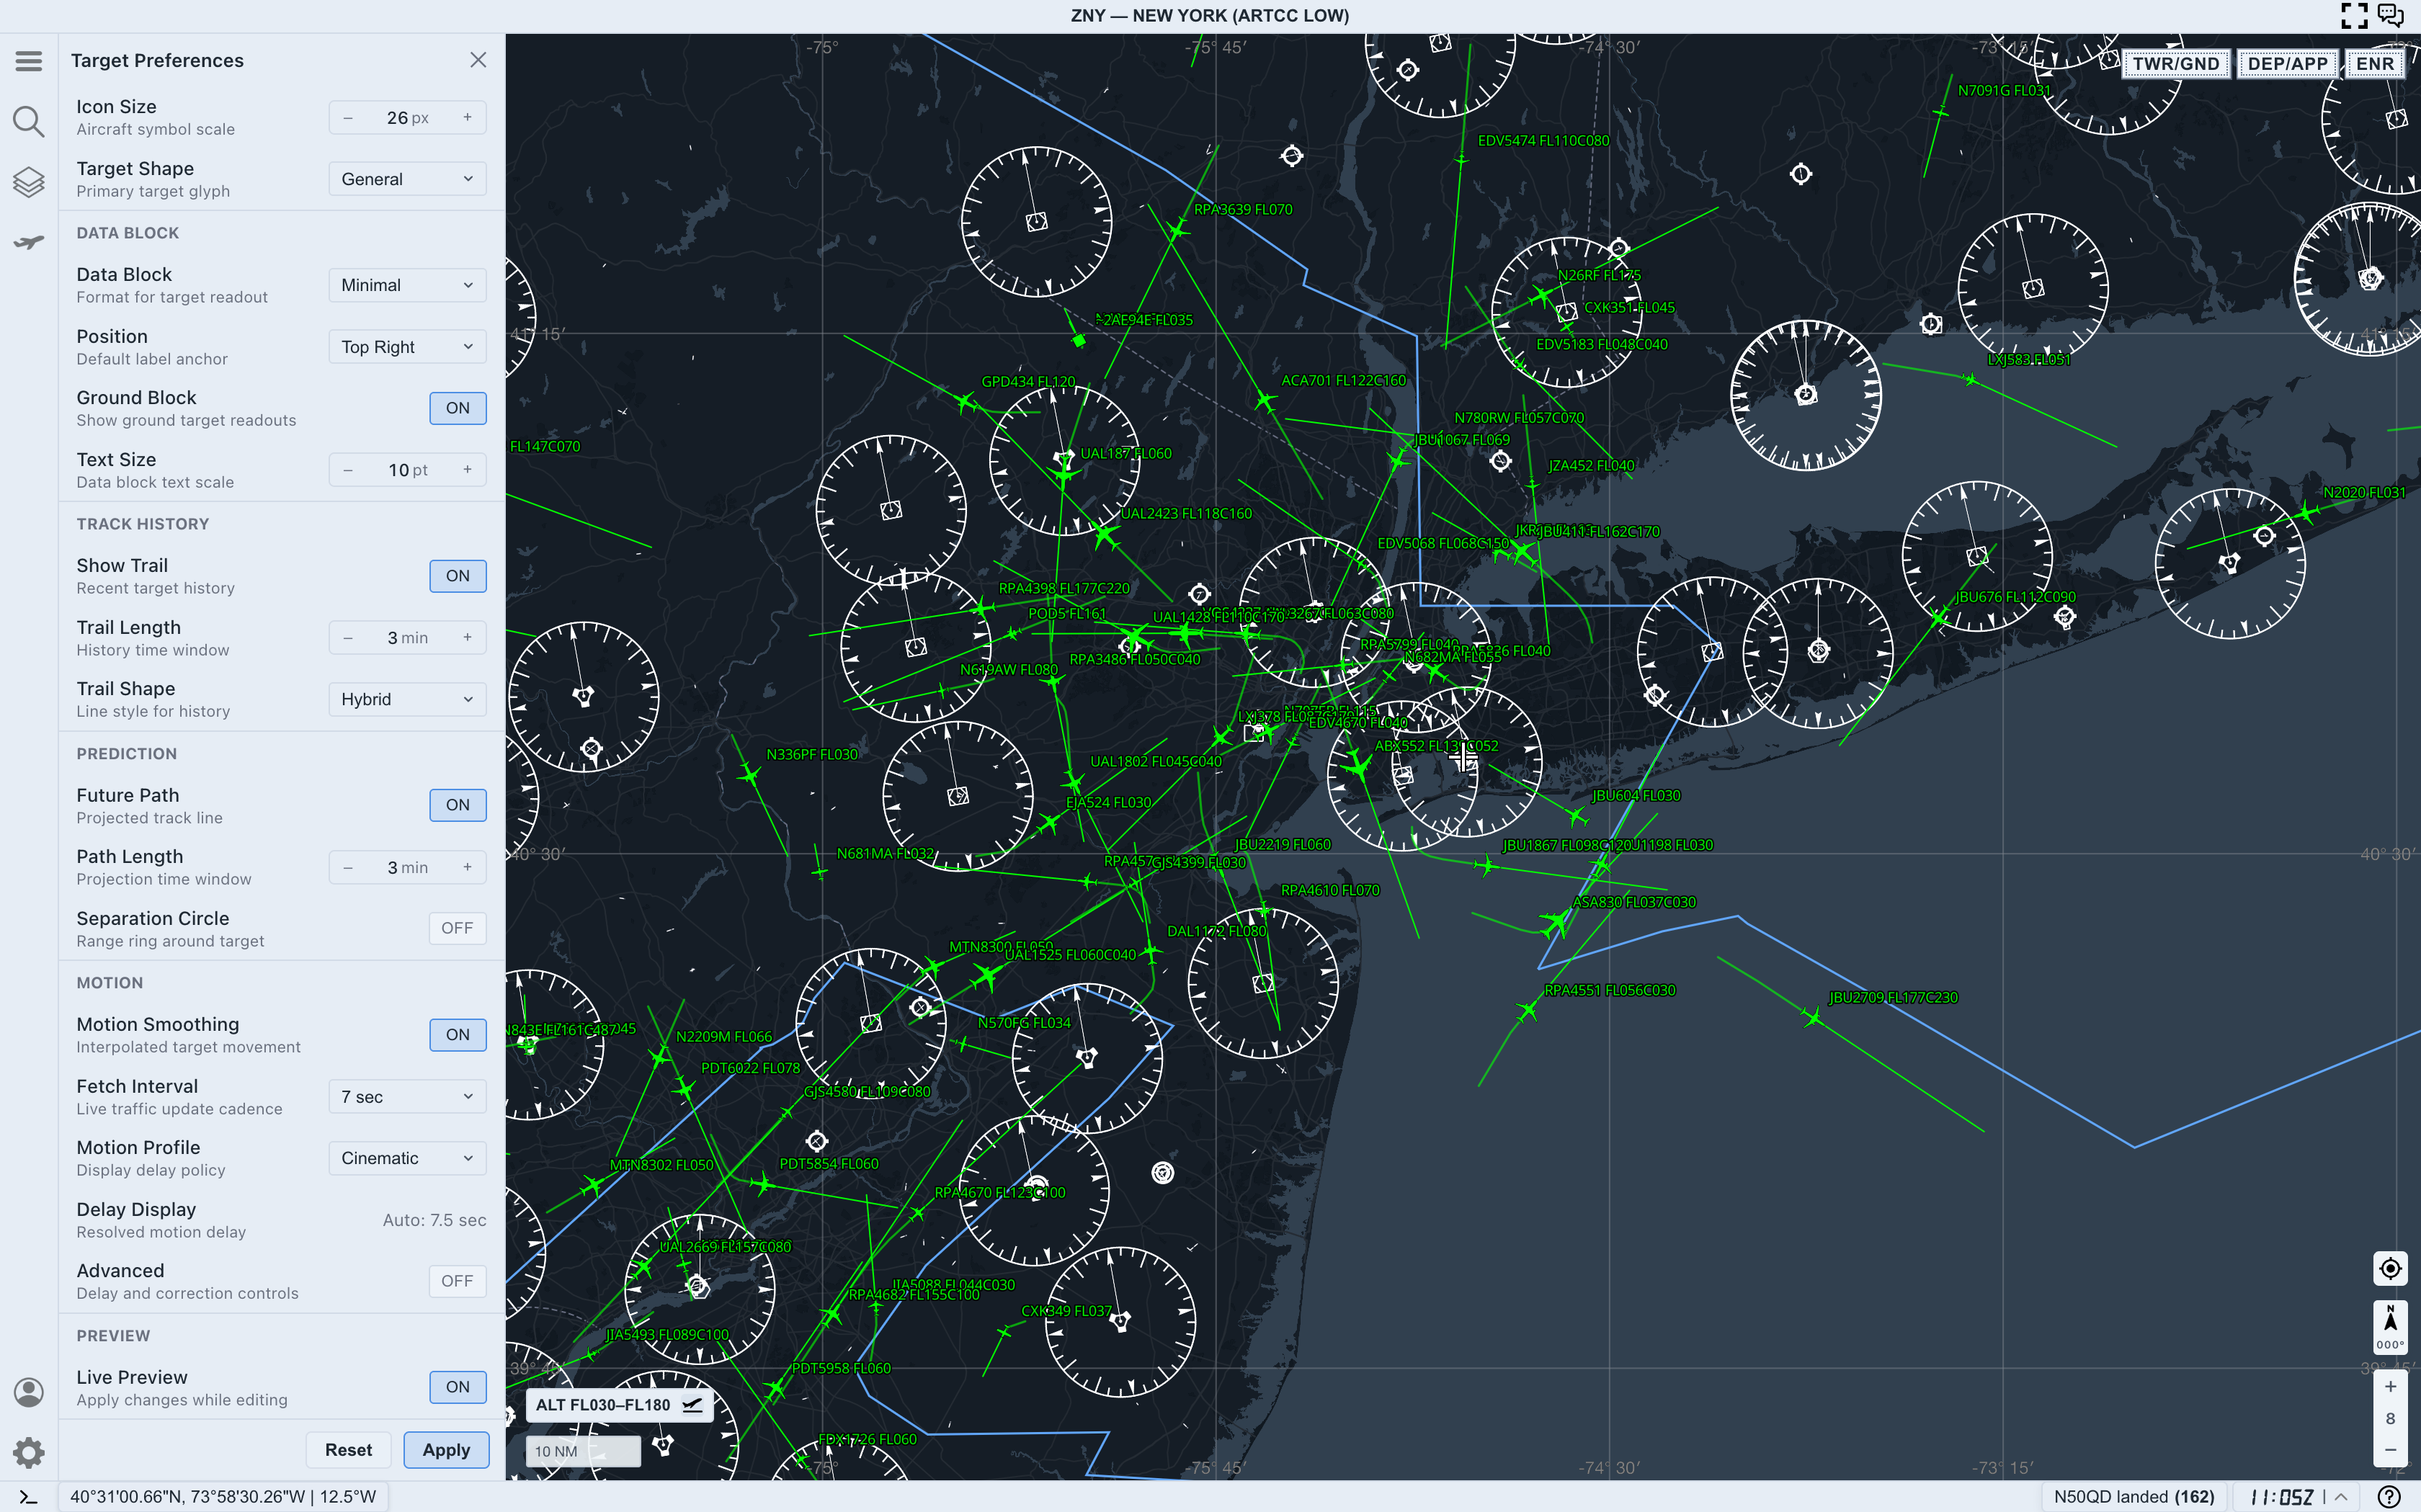
Open Target Preferences from the left rail or settings workflow. The panel opens beside the map so you can tune the display while watching the traffic picture.
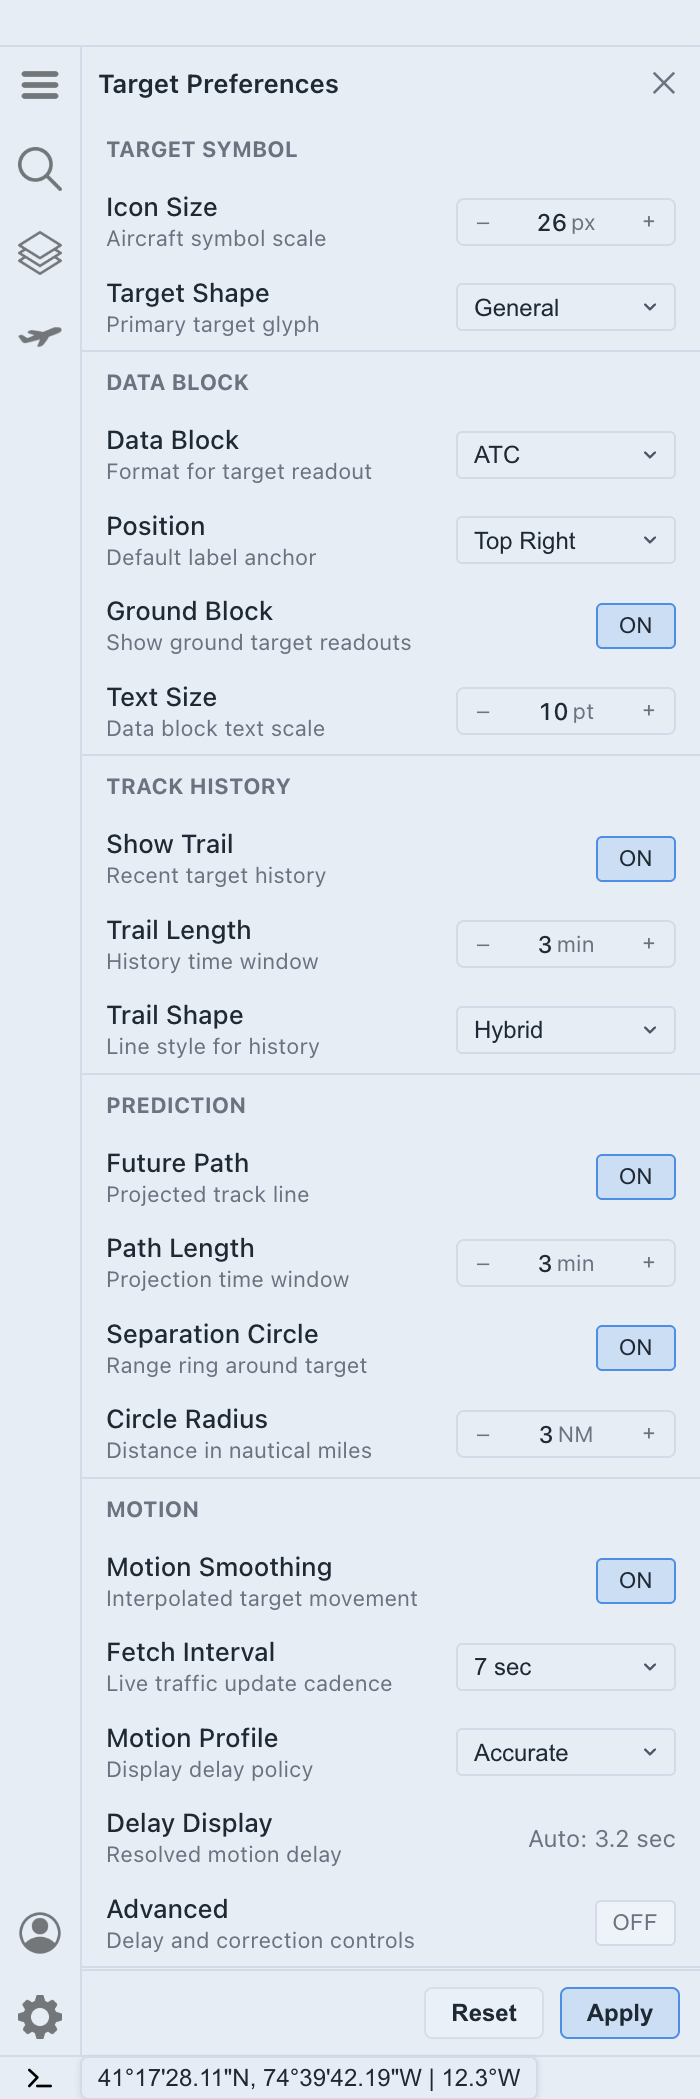
The panel is organized around the main parts of a target display:
- target symbol
- data block
- track history
- prediction
- motion
- preview and apply controls
Read it as a display configuration panel, not a traffic data panel. If a target disappears, check workspace mode and altitude filter first. If a target remains visible but feels too noisy or too sparse, use Target Preferences.
Step 2. Set symbol size before label detail
Start with the target symbol. Icon Size controls the aircraft symbol scale, and Target Shape controls the primary target glyph.
Use a larger icon when:
- you are zoomed out and aircraft are hard to pick out
- you are following one selected target
- traffic density is low enough that larger symbols do not collide
- you are working from a high-resolution display at a distance
Use a smaller icon when:
- terminal traffic is dense
- aircraft symbols overlap nearby labels
- separation circles or trails are already adding visual weight
- you need more map context around each target
Set the symbol size before changing label detail. If the aircraft glyph itself is too large, even a minimal label can make the map feel crowded.
Step 3. Choose the right data block
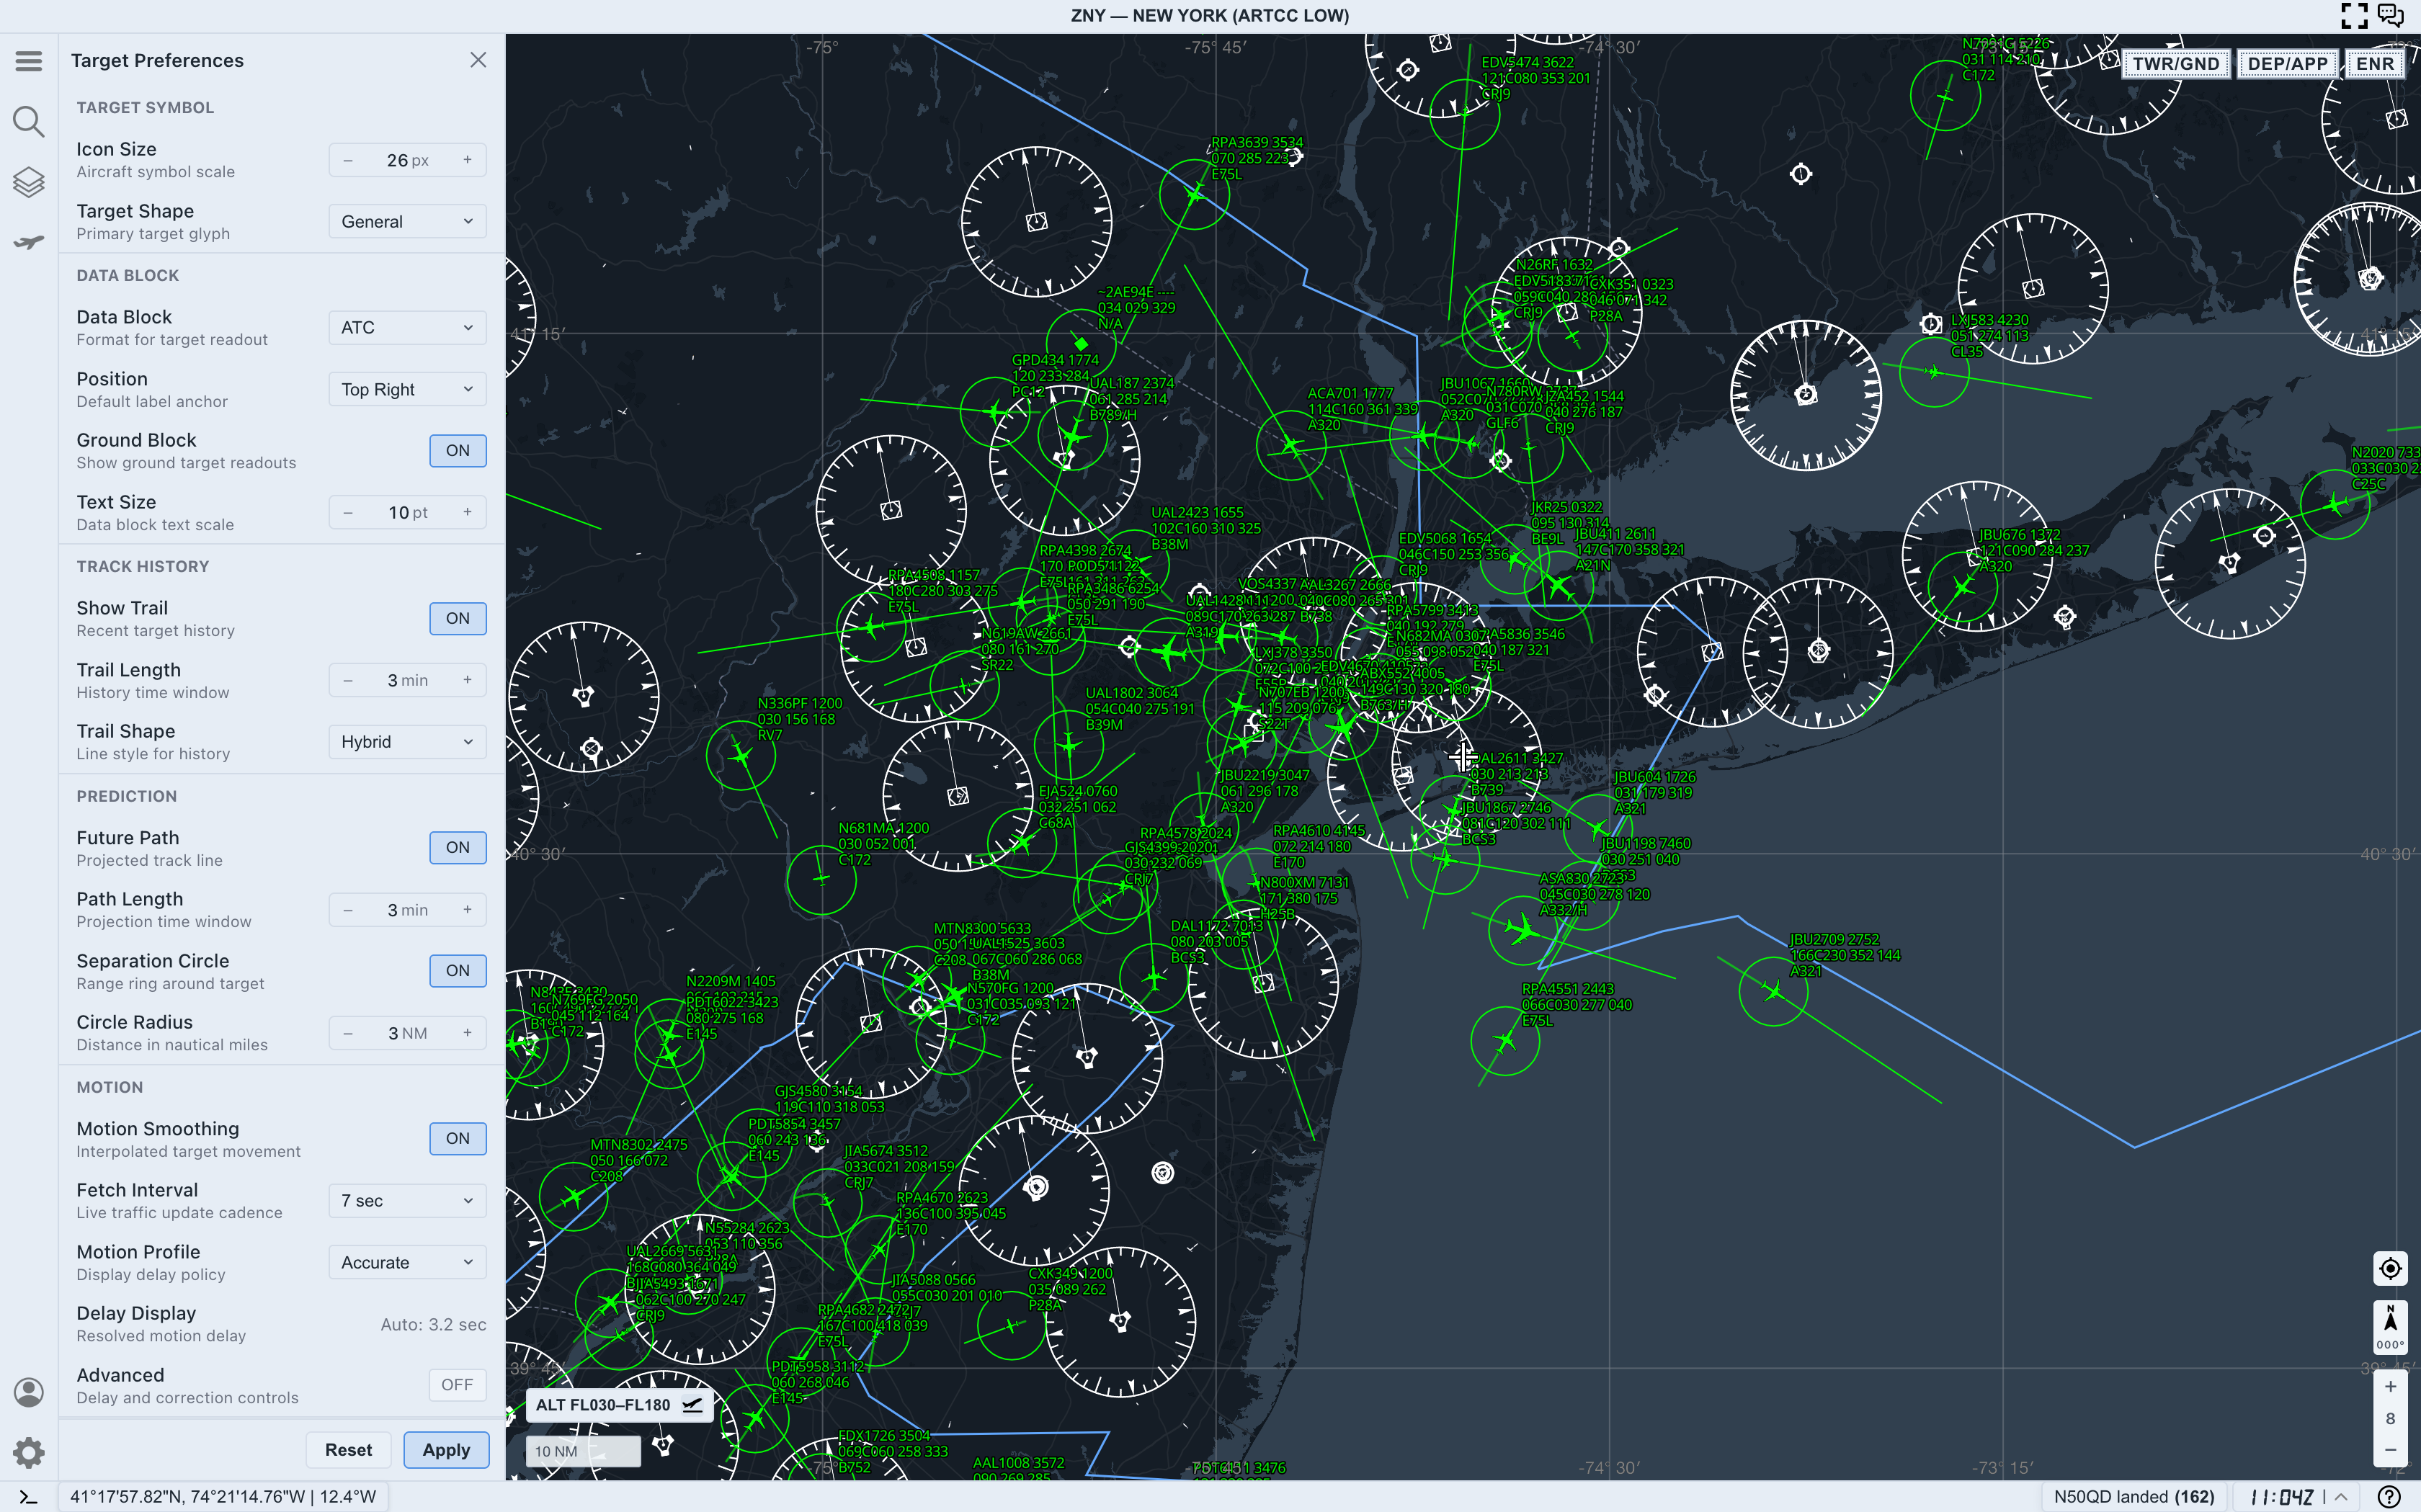
The data block is the text attached to each target. It is usually the largest source of map density.
Use Data Block to choose how much readout AO shows. A minimal block is useful when the map is crowded. An ATC-style or fuller block is useful when you need more context around each aircraft.
Use a smaller or simpler data block when you want to:
- scan traffic flow instead of reading individual aircraft
- reduce label collisions near a major airport
- keep airspace boundaries, range rings, and trails visible
- use Range Calculator without extra labels fighting the measurement line
Use a richer data block when you want to:
- compare callsign, altitude, speed, heading, and type directly on the map
- watch terminal flows without opening every target panel
- keep one workspace view while stepping through nearby aircraft
- inspect one area at a closer zoom level
The data block should answer the question you are asking. If you are only looking for flow direction, a full label may be too much. If you are comparing aircraft in the same stream, a minimal label may hide the values you need.
Step 4. Place labels where they stay readable
Position controls the default label anchor around the aircraft symbol. The best position depends on zoom level, traffic density, and the direction aircraft are moving across the screen.
Use the position setting when labels repeatedly cover:
- the target symbol itself
- nearby aircraft
- route lines or airspace boundaries
- range measurements
- the selected target highlight
There is no single correct label position for every view. Choose the position that keeps the current traffic picture readable, then adjust again when you change modes, zoom level, or region.
Step 5. Use ground blocks only when ground traffic matters
Ground Block controls whether ground target readouts appear for aircraft on the surface.
Keep ground blocks on when:
- you are using
TWR/GND - airport surface movement matters
- you are watching taxi, ramp, or runway-adjacent activity
- you need ground aircraft visible beside low-altitude traffic
Turn ground blocks off when:
- you are studying airborne terminal traffic
- ground labels are filling the airport area
- you are using
DEP/APPorENRand surface aircraft are not relevant - you only need airborne spacing or flow
This is one of the fastest ways to reduce noise near busy airports without changing the altitude filter.
Step 6. Add trails to understand recent movement
Track history helps you see where an aircraft has been. Show Trail, Trail Length, and Trail Shape control how much recent movement AO draws.
Use trails when you want to:
- understand recent turns
- compare aircraft moving through the same flow
- see whether a target is stabilizing, turning, or maneuvering
- read motion without selecting each aircraft
Shorter trails are better for dense terminal views. Longer trails are useful when you are studying flow over time or watching high-altitude traffic at a wider zoom.
If the map starts to look like every aircraft is dragging visual clutter behind it, shorten the trail before turning on more display features.
Step 7. Use future path and separation circles carefully
Prediction settings add forward-looking context. Future Path shows projected movement, and Path Length controls the projection time window. Separation Circle adds a range ring around each target, with Circle Radius setting the distance in nautical miles.
Use future path when:
- you want to compare where aircraft are likely to be in the next few minutes
- you are watching converging or diverging flows
- you need a quick sense of direction without opening target details
- the current map is readable enough to support prediction lines
Use separation circles when:
- you are comparing approximate spacing
- one selected target needs a visible range reference
- you are working at a scale where the circle radius makes sense
- the circles do not hide the traffic you are trying to read
Prediction lines and circles are powerful, but they can overwhelm a dense map quickly. If you turn both on, keep the radius and path length modest until the view still reads cleanly.
Step 8. Tune motion behavior for trust and comfort
Motion settings affect how live traffic movement appears between feed updates.
Motion Smoothing can make target movement feel more continuous. Fetch Interval controls the live traffic update cadence. Motion Profile controls the display delay policy, and Delay Display shows the resolved motion delay. Advanced controls are for deeper delay and correction workflows.
Use a smoother profile when:
- you want continuous visual movement
- you are watching one selected aircraft over time
- small jumps between feed updates are distracting
- you are using Follow Target
Use a more direct or accurate profile when:
- you care more about source update timing than visual continuity
- you are checking data freshness
- you are comparing motion against the detail panel
- you want fewer display assumptions between feed updates
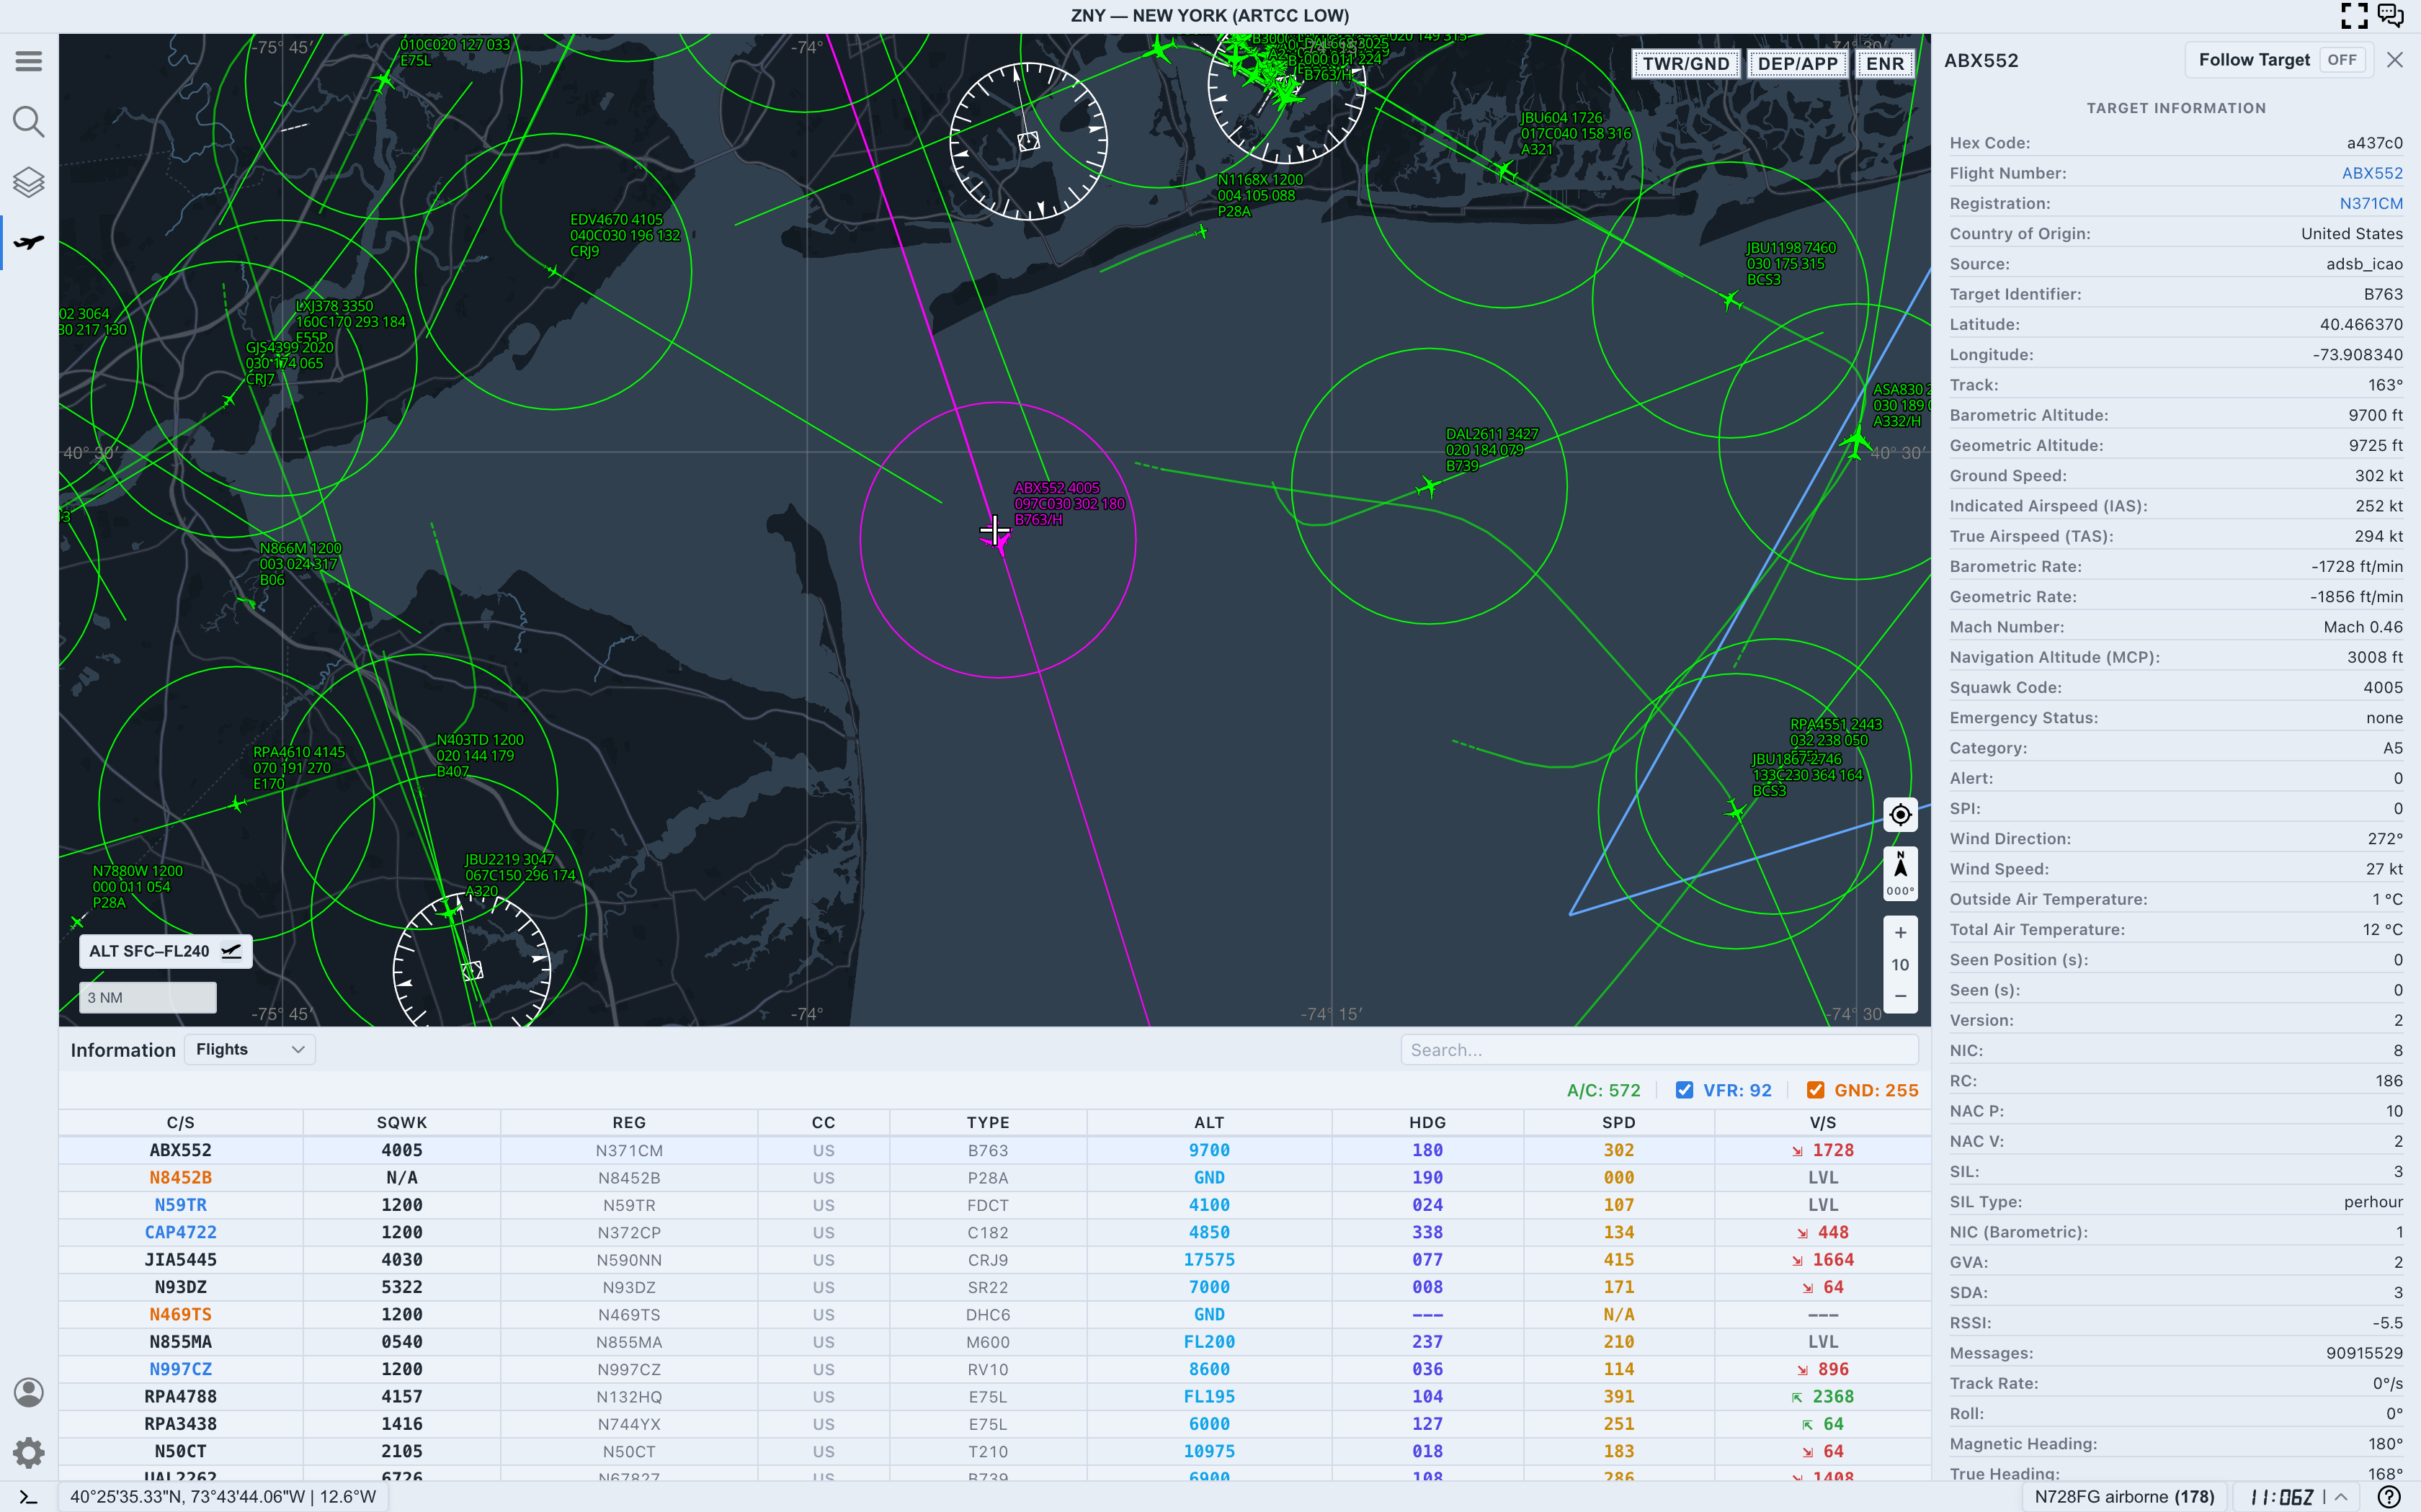
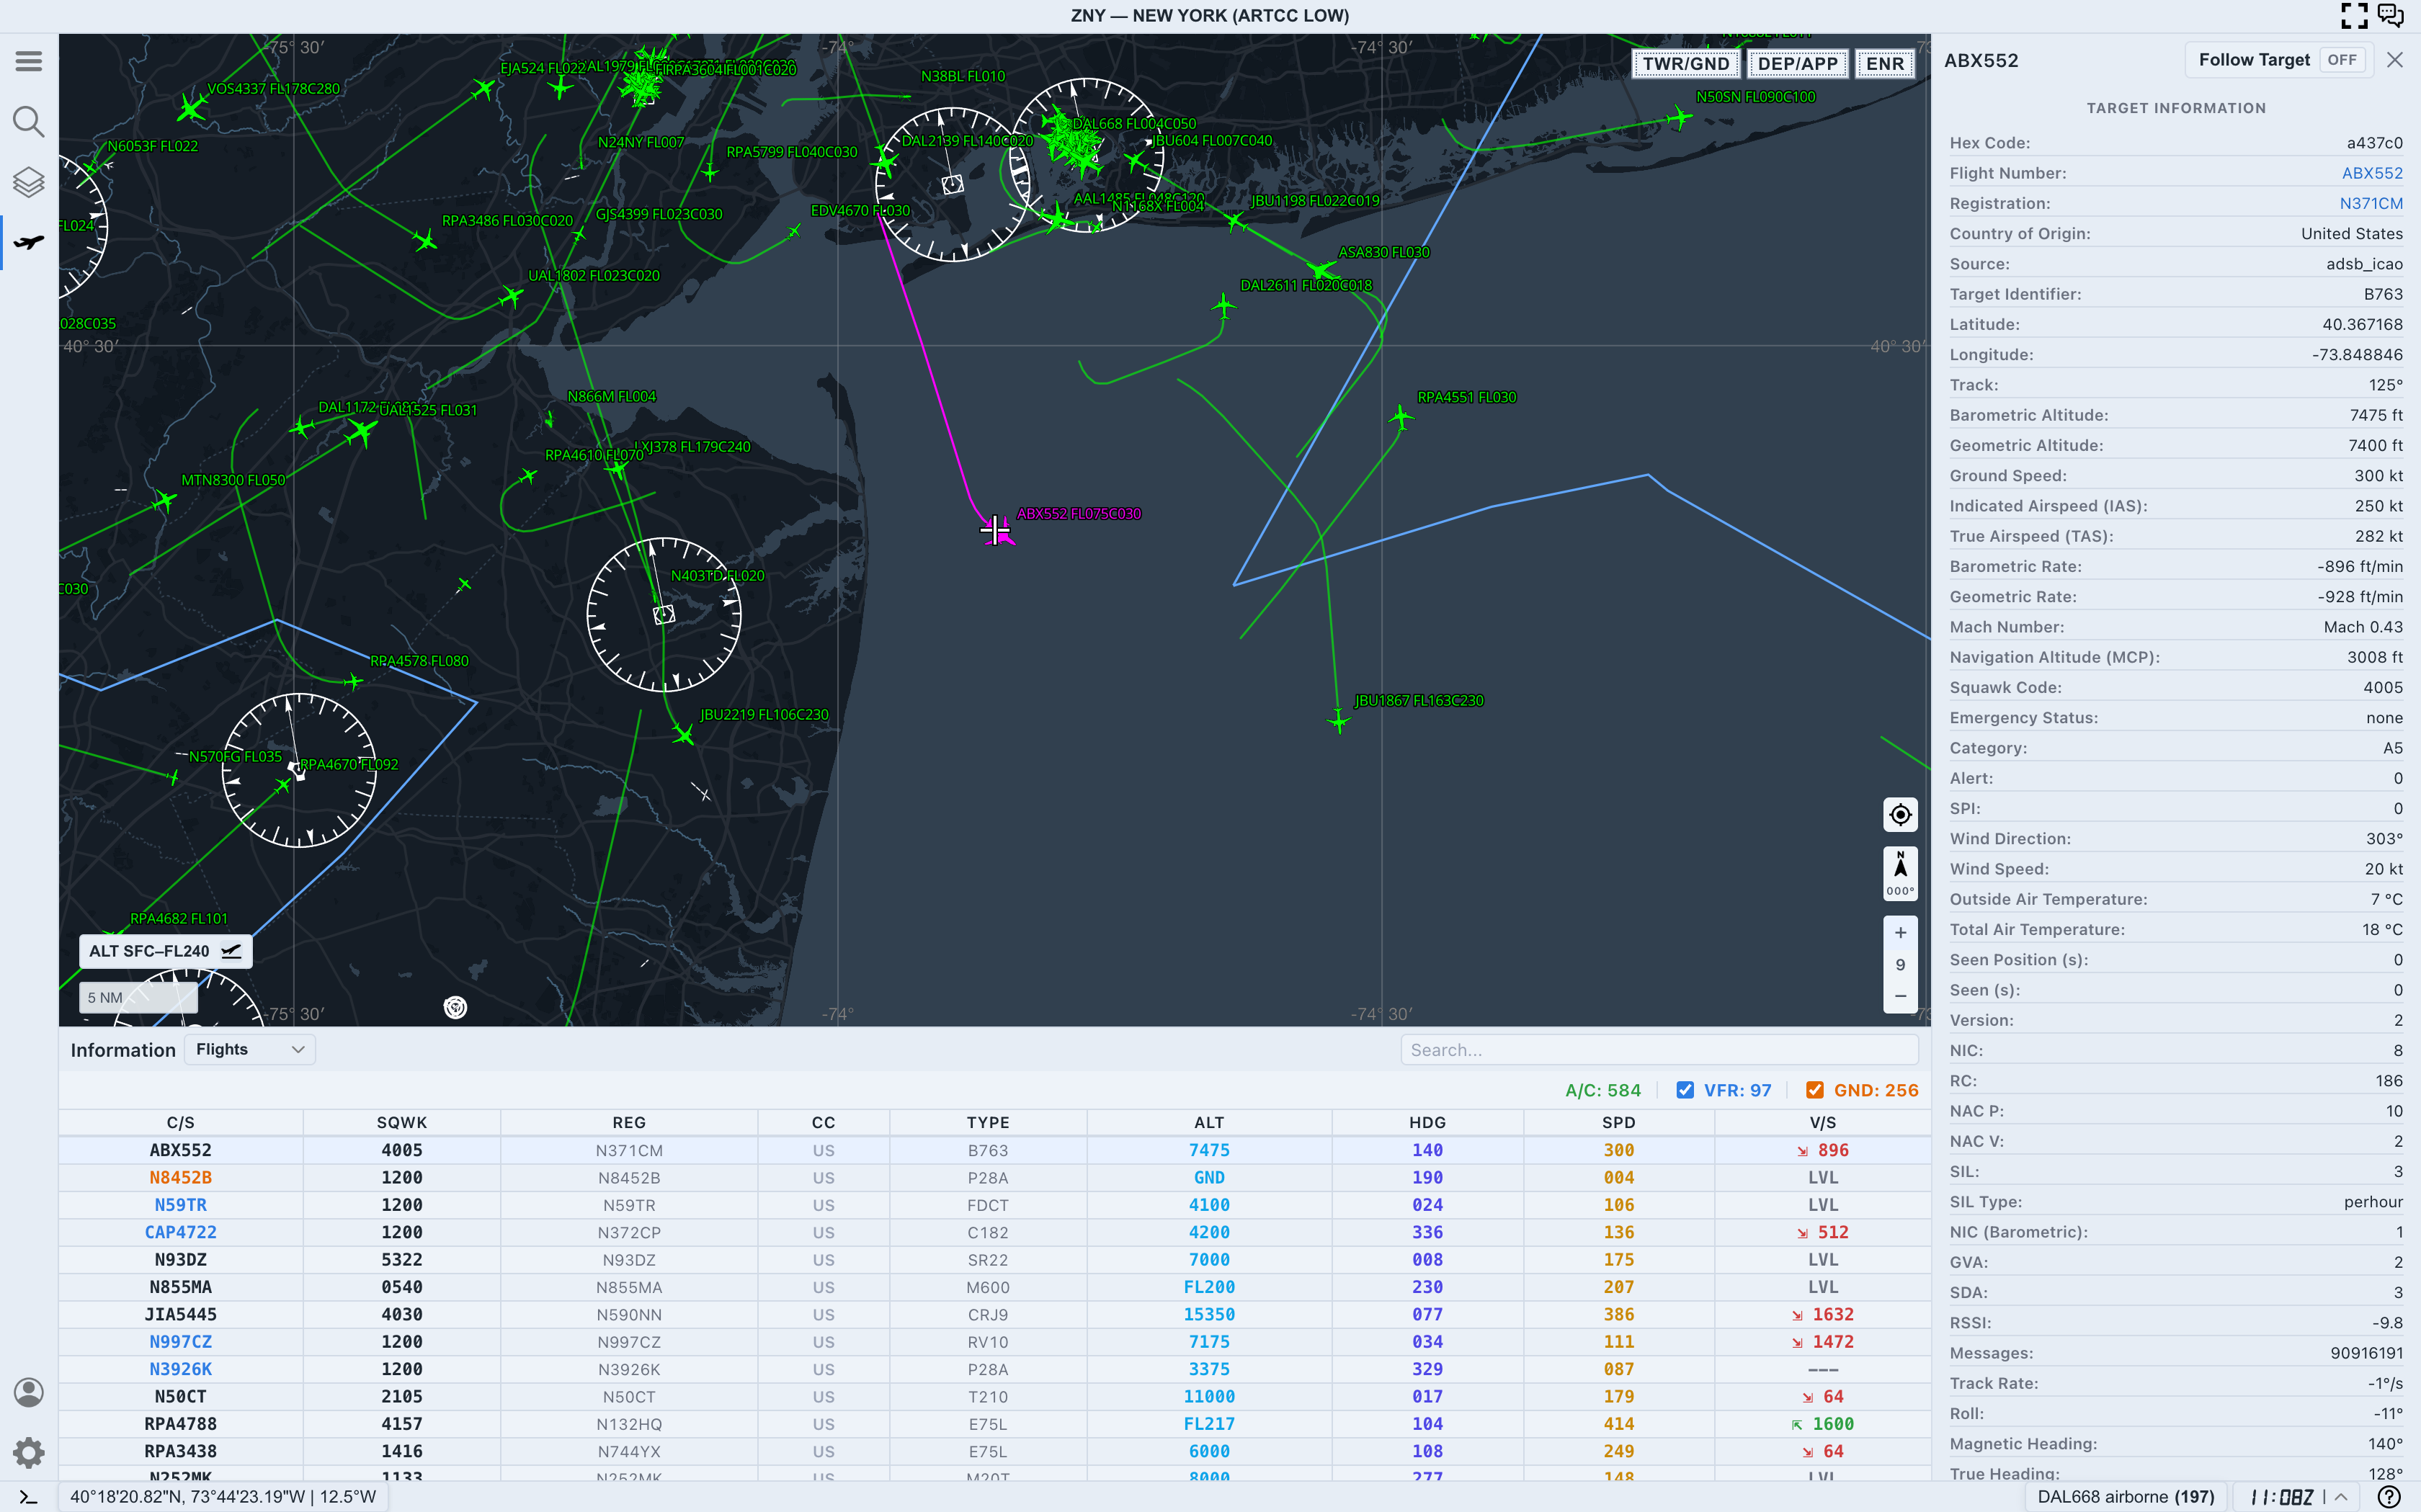
Motion preferences change how movement is displayed. They do not make stale traffic fresh. Continue checking Seen Position (s) and Seen (s) in the target detail panel when precision matters.
Step 9. Use live preview before applying
Live Preview lets you see changes on the map while editing. This is useful because display preferences are easier to judge visually than from the control labels alone.
Use live preview to test one change at a time:
- Change icon size.
- Check whether symbols remain readable.
- Change the data block format.
- Check label density.
- Add or shorten trails.
- Add prediction or separation circles only if the map still reads cleanly.
- Apply the settings when the traffic picture works.
If a change makes the map harder to read, use Reset or reverse that one setting before adjusting something else.
Practical reading order
When tuning target display, use this order:
- Choose the workspace mode.
- Set the altitude filter.
- Pick a target symbol size.
- Choose the data block format.
- Adjust label position and text size.
- Add trails only when recent movement matters.
- Add future path and separation circles only when spacing or projection matters.
- Apply the settings after checking the live preview.
This keeps Target Preferences tied to a real traffic-reading task instead of becoming a collection of unrelated display tweaks.
Common mistakes
- Turning on full data blocks, trails, future paths, and separation circles all at once
- Using one display setup for
TWR/GND,DEP/APP, andENR - Making symbols larger before reducing unnecessary labels
- Leaving ground blocks on when surface traffic is not part of the question
- Treating motion smoothing as a data freshness setting
- Applying changes before checking live preview on the actual map
Next step
After you can tune target display clearly, combine this workflow with altitude filters, Range Calculator, and Follow Target. The goal is not to show every possible value on the map. The goal is to show the values that help the current traffic picture stay readable.