
This quickstart is for a first useful AO session. The goal is not to learn every panel. The goal is to open the workspace, find one live aircraft, understand what AO is showing, and make one practical measurement.
In about 15 minutes, you will learn how to:
- read the active map workspace
- search for an aircraft by callsign
- select a target and use the automatic detail panel
- read the first flight fields that matter
- measure distance with Range Calc Mode
- use display toggles without losing your place
Before you start
- Open AO in a desktop browser at
https://anobservatory.com. - Use the current default workspace and browser zoom at 100%.
- Keep
Live Trafficon. - Keep MSFS Connect off for this walkthrough.
- Start in the operating context AO opens with, or choose the context closest to your task from
TWR/GND,DEP/APP, andENR.
Step 1. Read the workspace
Start by understanding the screen before clicking into traffic.
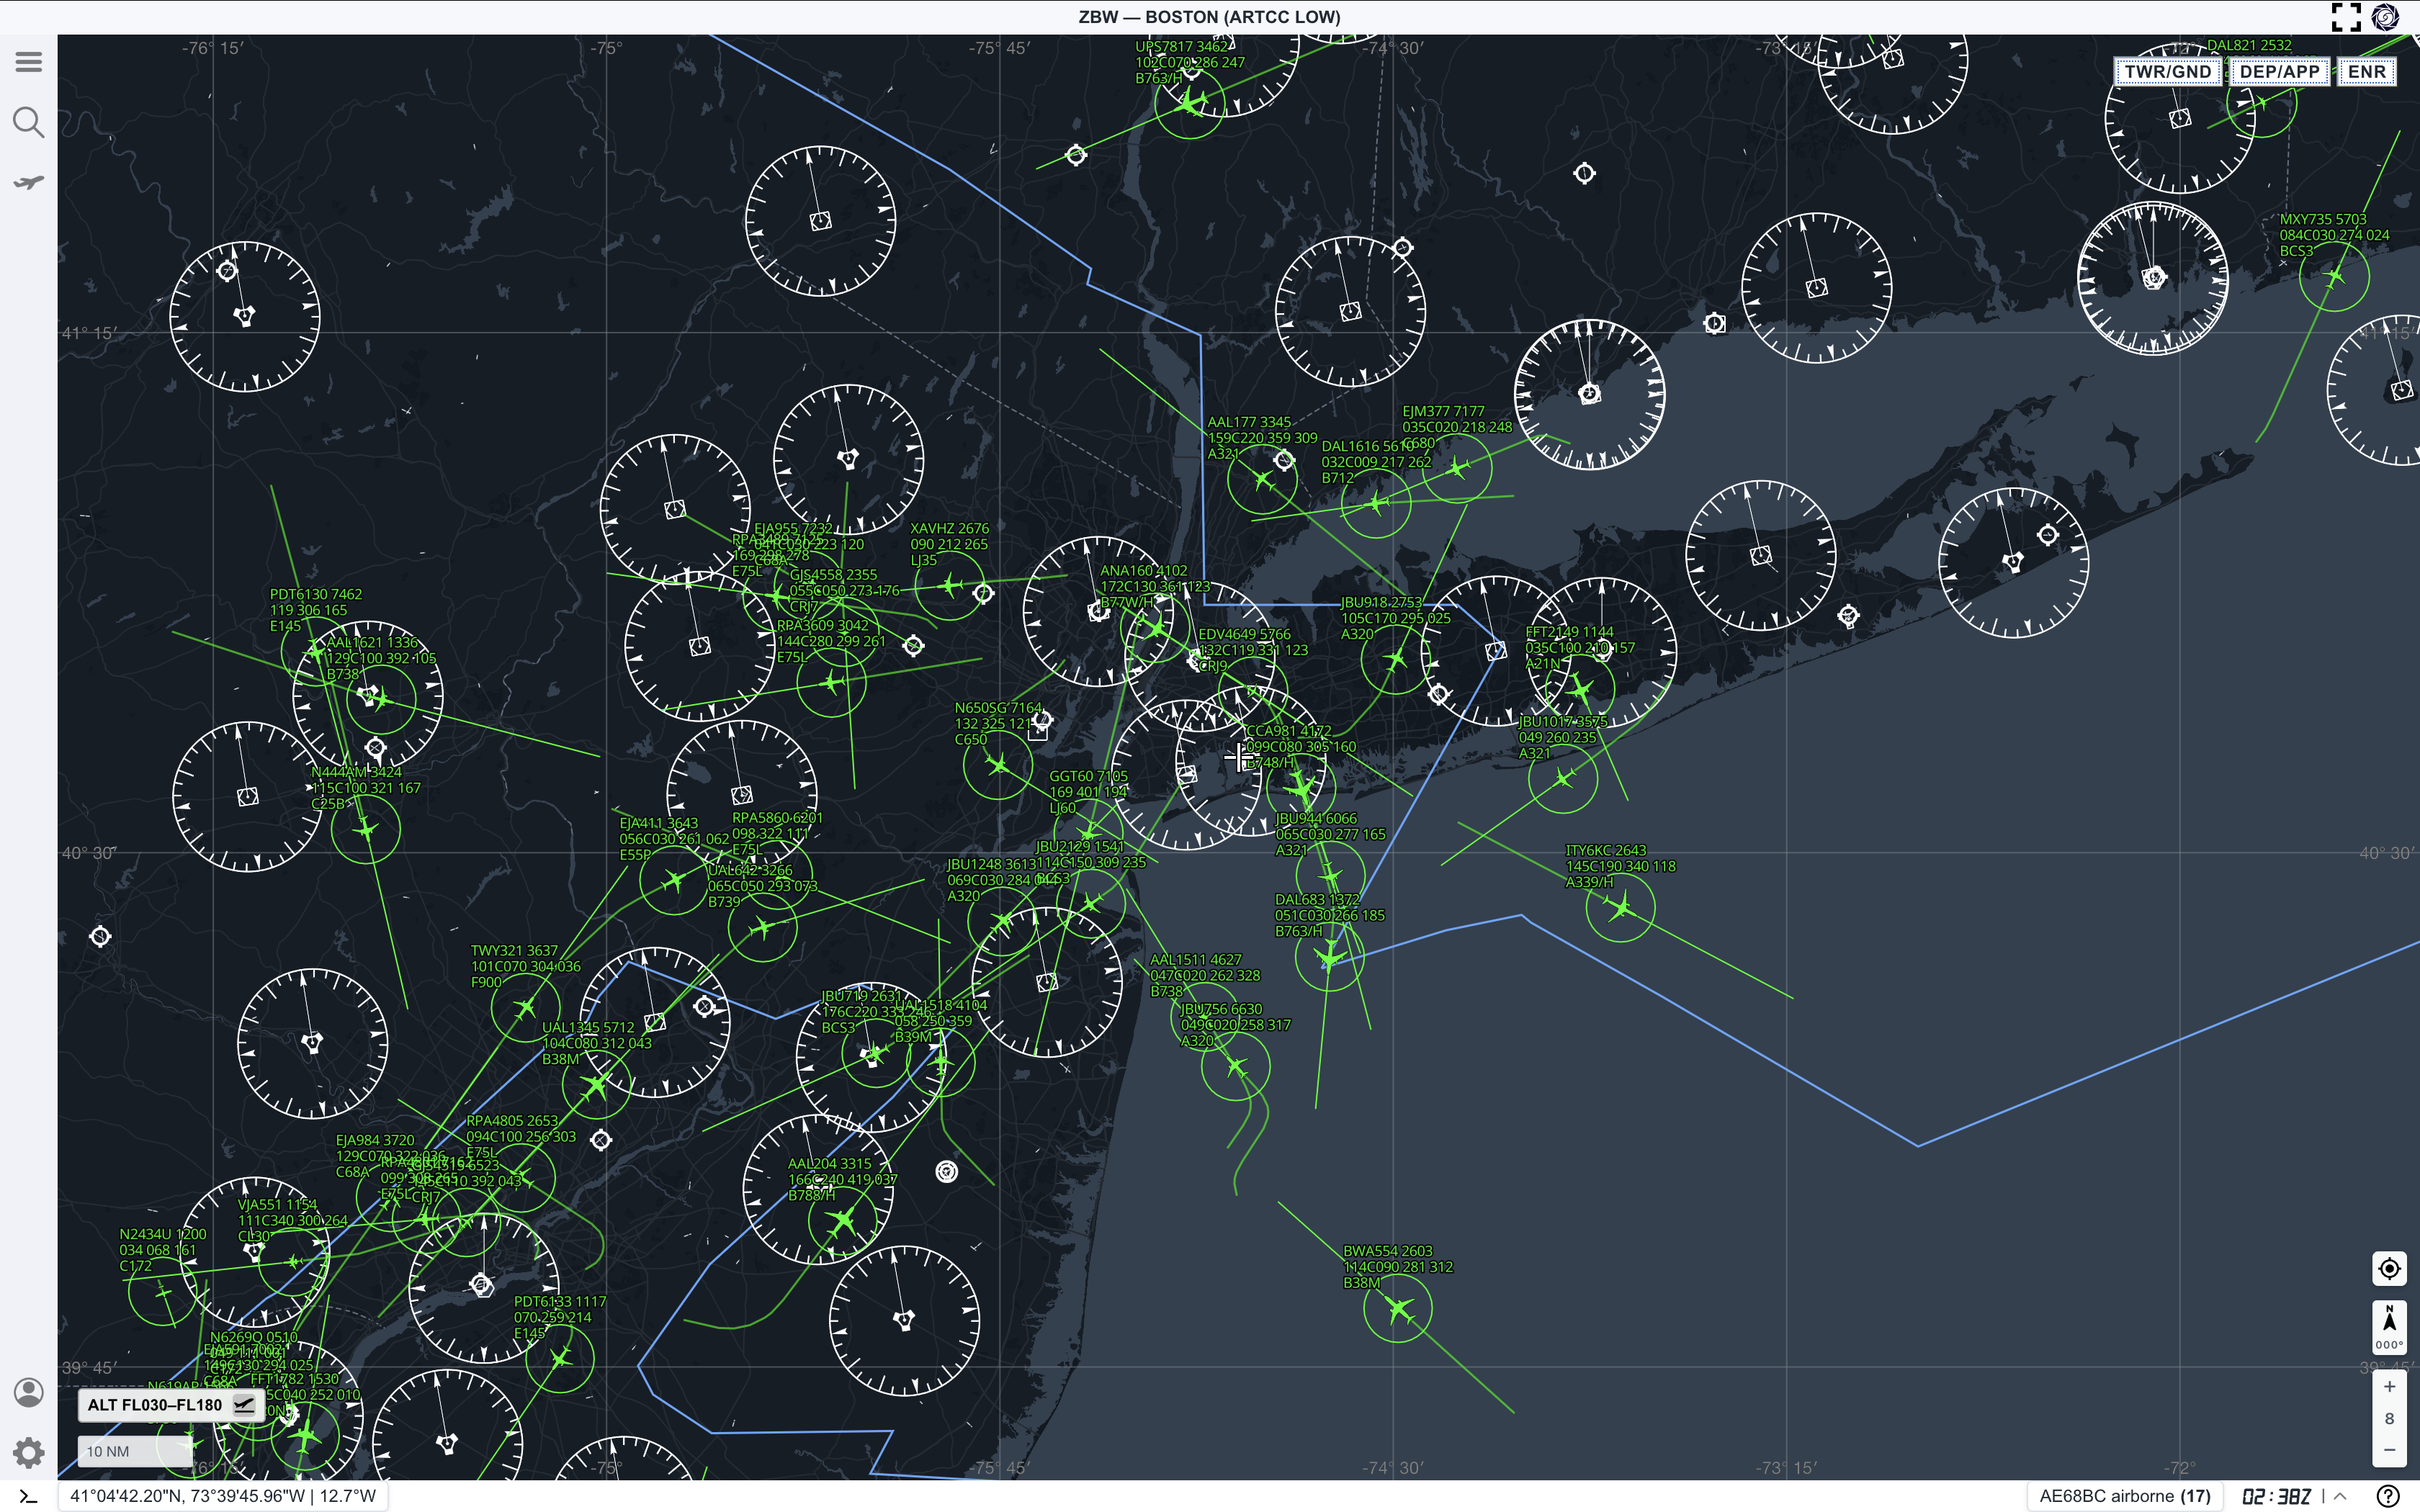
Use the workspace in layers:
- The map is the primary surface. Aircraft, tracks, range rings, airspace, and gridlines are read together.
- The left rail opens the main menu, search, layers, traffic tools, account, settings, and terminal.
- The top bar shows the active control area or map context.
- The top-right mode buttons switch between
TWR/GND,DEP/APP, andENR. - The lower edge shows map position, scale, altitude filter, clock, alerts, and status information.
Do not try to tune everything first. For a first pass, keep the map readable and learn one workflow end to end.
Step 2. Search for one aircraft
Open ATC Search from the left rail. Set the search type to Aircraft, then enter a callsign or identifier.
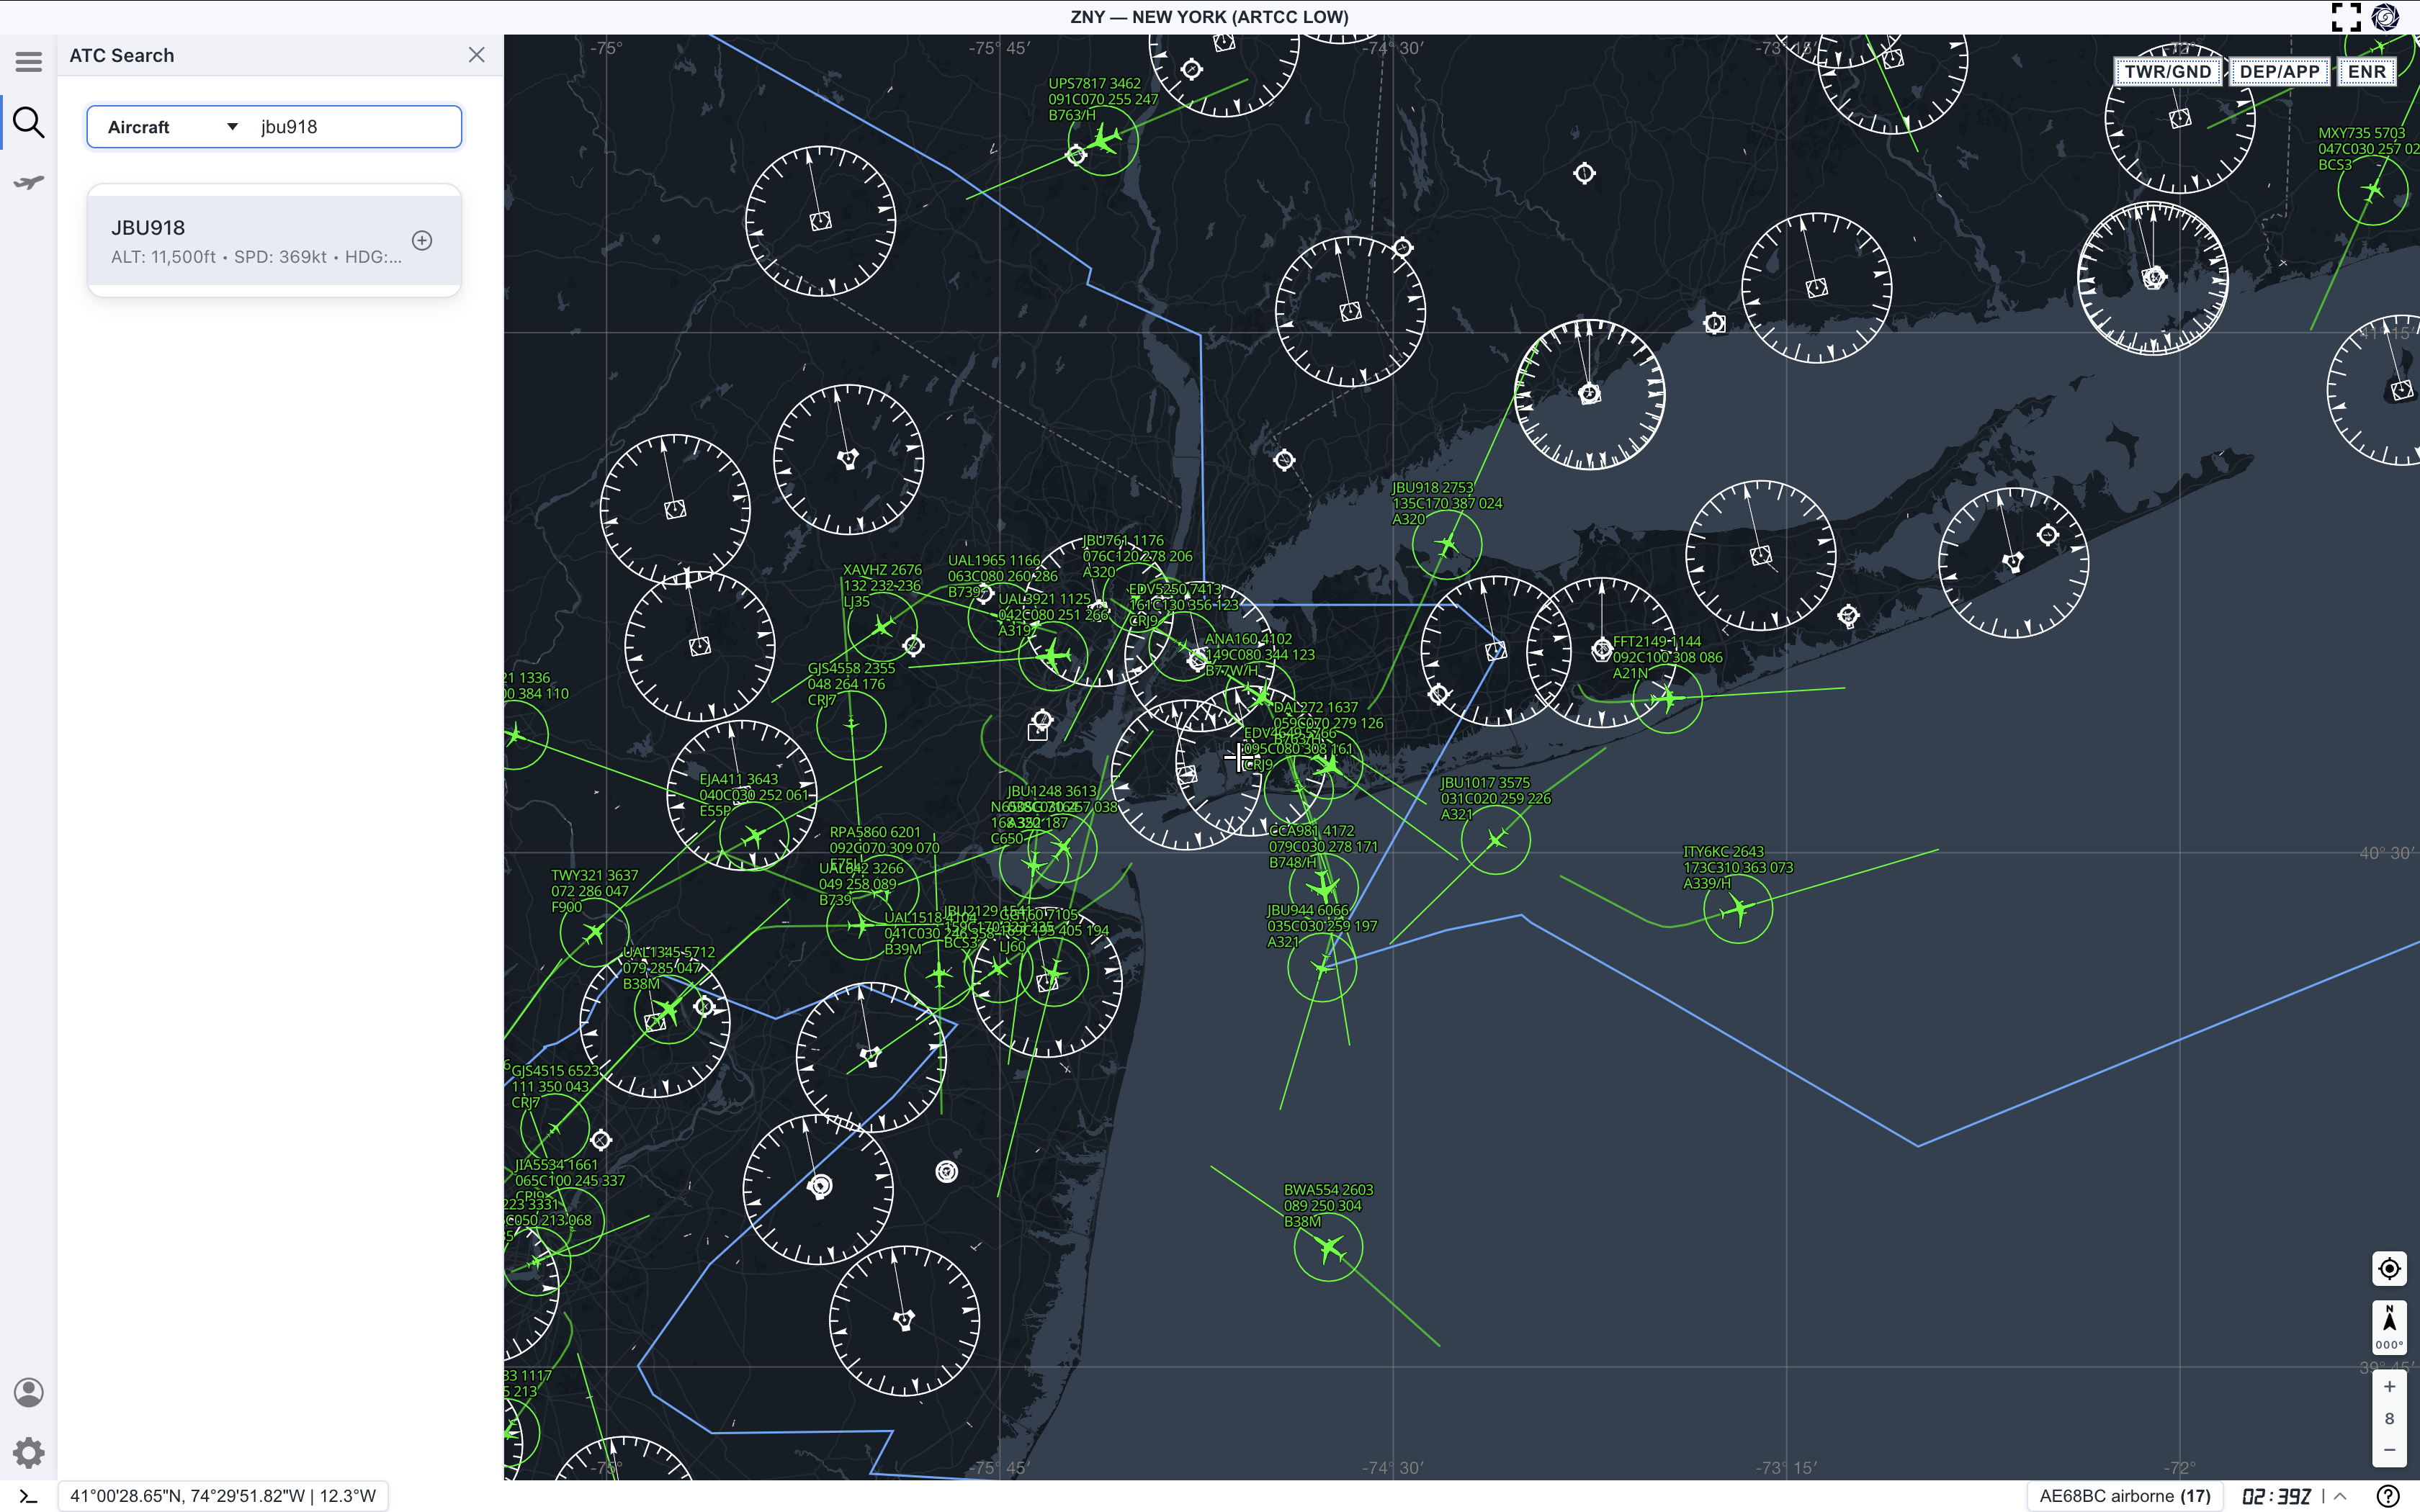
In this example, the search returns ANA110 with altitude, speed, and heading in the result row. Select the result to move from search into target inspection.
If your search returns too many results, use a more specific callsign. If it returns nothing, check that live traffic is on and try a nearby aircraft label from the map.
Step 3. Select the target
When you select an aircraft, AO highlights that target on the map and opens the target detail panel automatically.
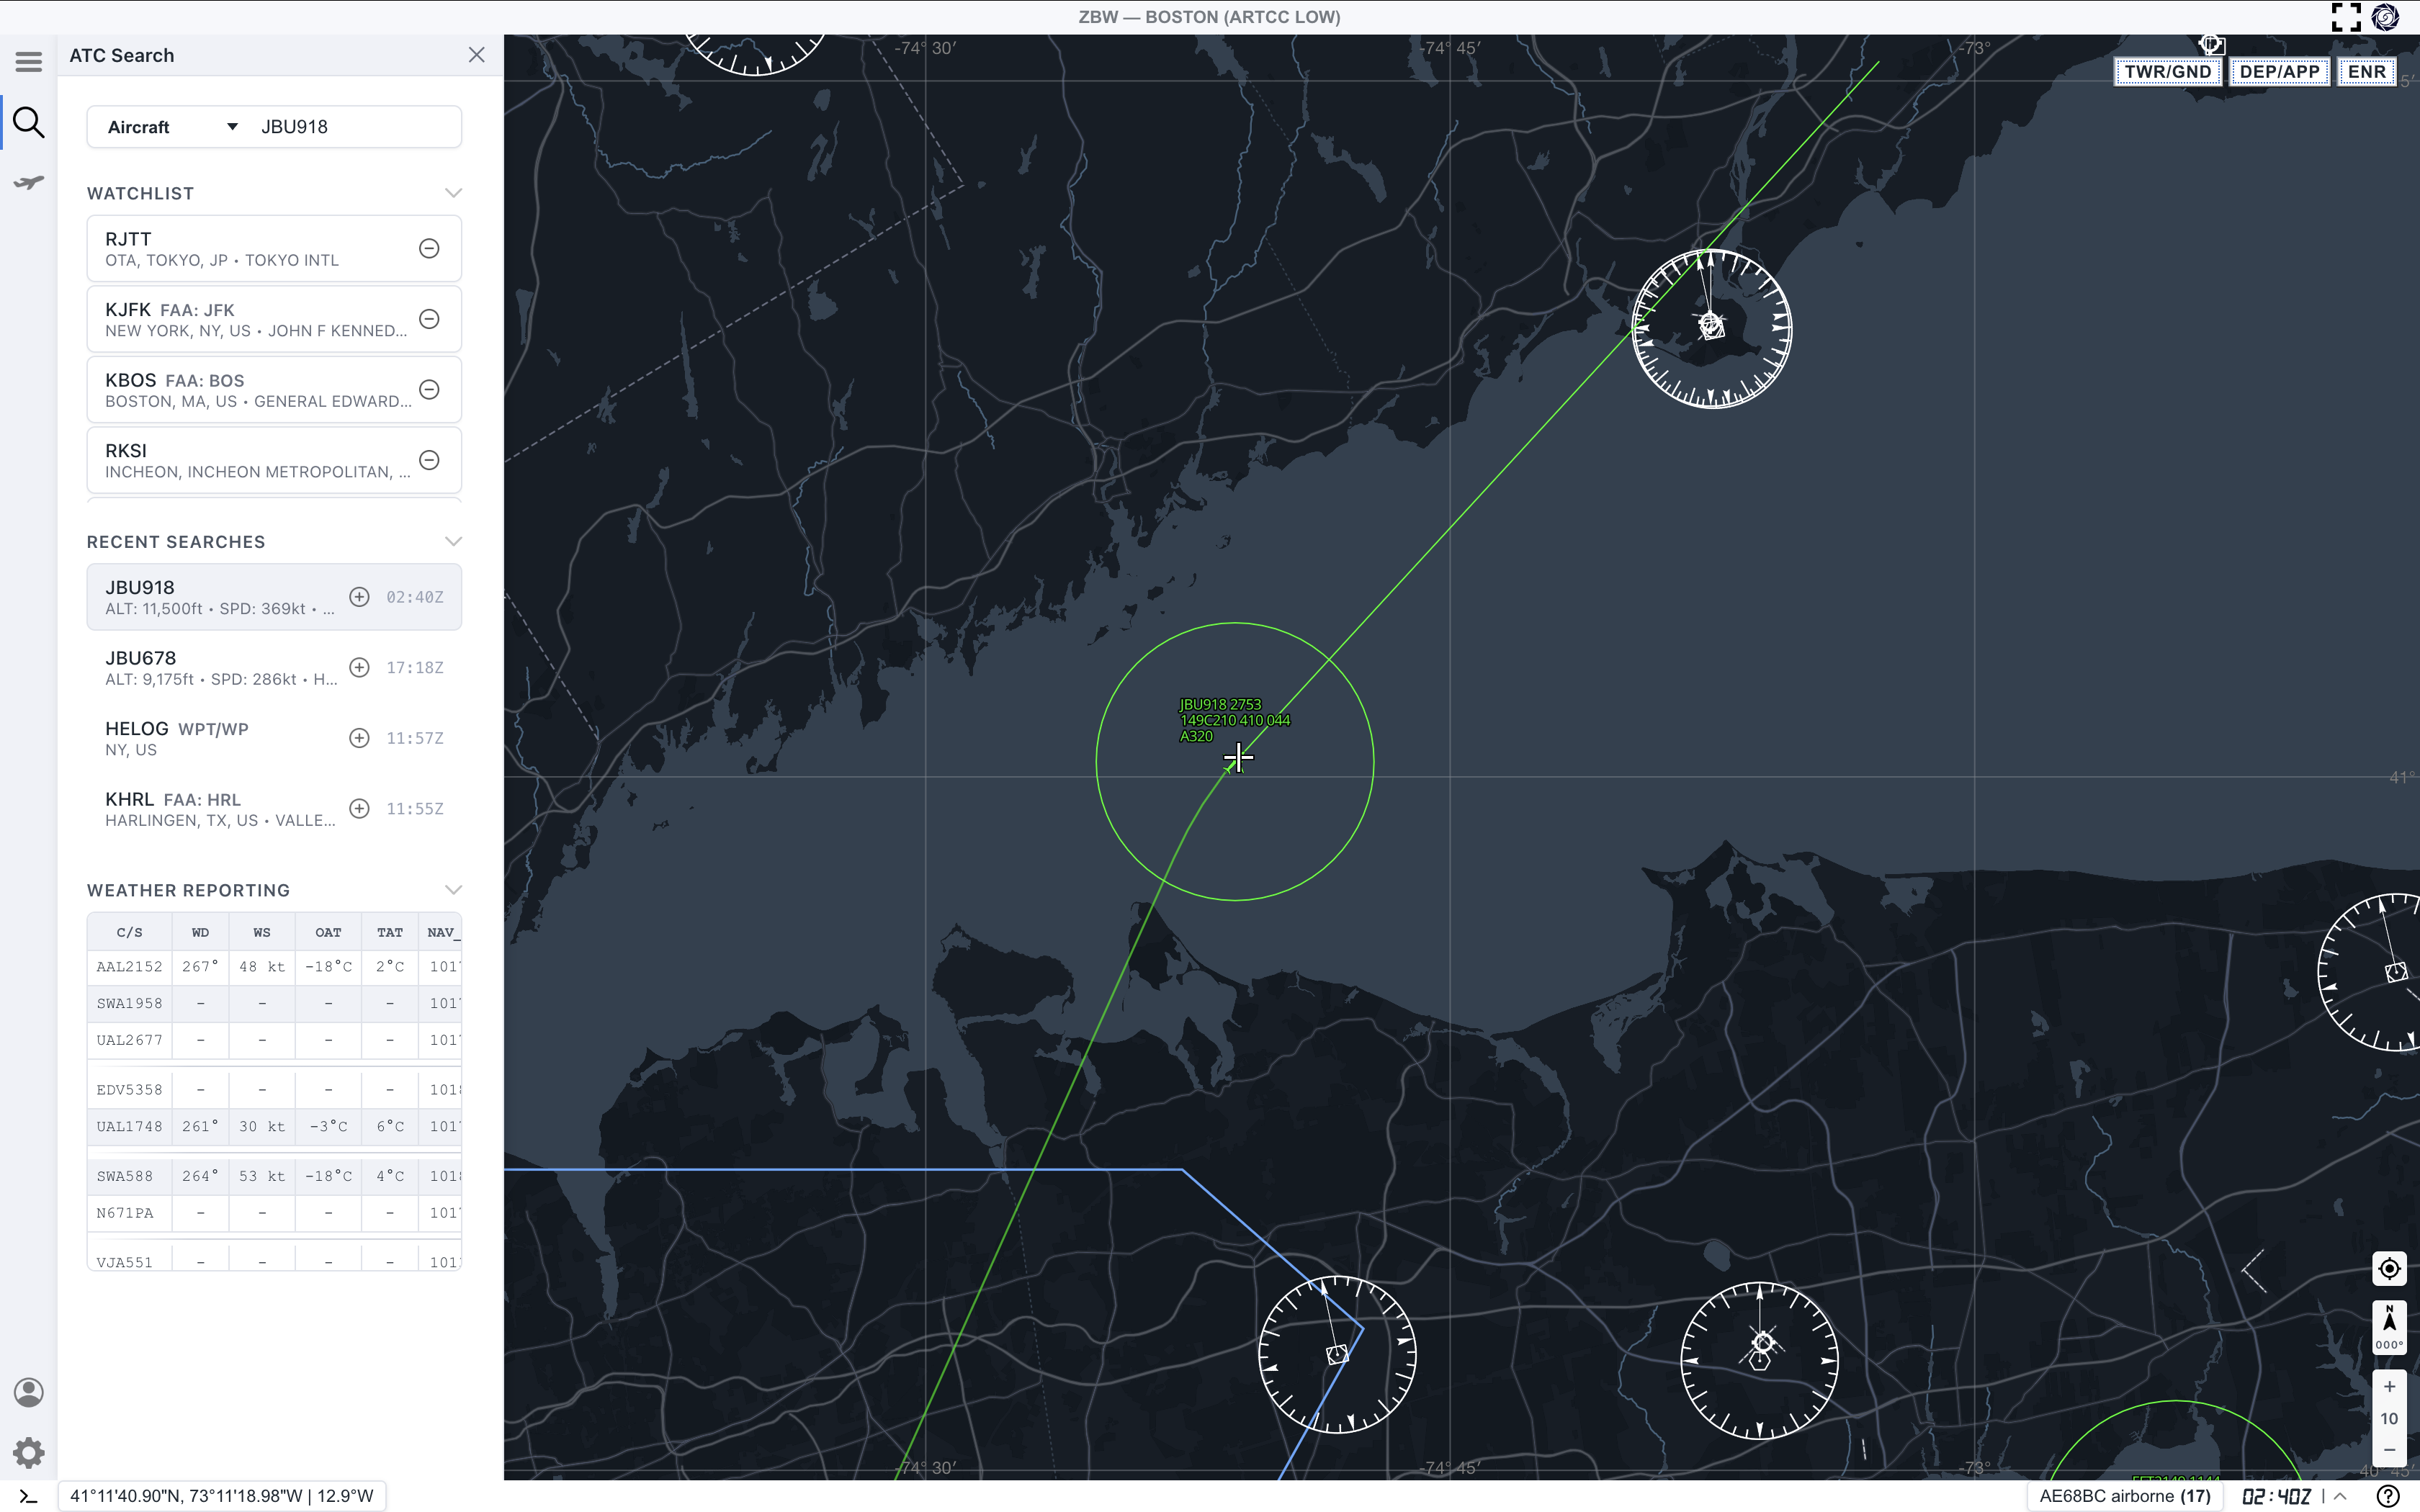
Confirm three things before reading deeper:
- The highlighted aircraft on the map matches the callsign you searched.
- The right-side target panel shows the same callsign.
- The bottom flights table includes the selected aircraft and nearby traffic for comparison.
The selected target may use a different color from surrounding traffic. Treat that as your anchor while reading the rest of the screen.
Step 4. Read the target details
The target detail panel is the fastest way to confirm what AO knows about one aircraft. Continue from the selected target view and read the panel on the right.
Start with these fields:
Flight Number: the callsign or flight identifier you selectedSource: where the live traffic record came fromBarometric Altitude: altitude used for most quick traffic readsGround Speed: current speed over the groundTrack: direction of movement across the mapBarometric Rate: climb or descent trendSeen: how fresh the current position data is
Do not judge the whole traffic picture from one value. Look at altitude, track, speed, vertical rate, and freshness together.
Step 5. Use the flights table for context
The bottom Flights table gives you a compact comparison view. Use it after selecting one aircraft, not before.
Helpful first columns include:
C/Sfor callsignSQWKfor squawkTYPEfor aircraft typeALTfor altitudeHDGfor heading or trackSPDfor speedV/Sfor vertical speed
This table is useful when you want to compare the selected aircraft against surrounding traffic without opening a new target each time.
Step 6. Measure a distance
Enable Range Calc Mode from the tools workflow, then place measurement points on the map.
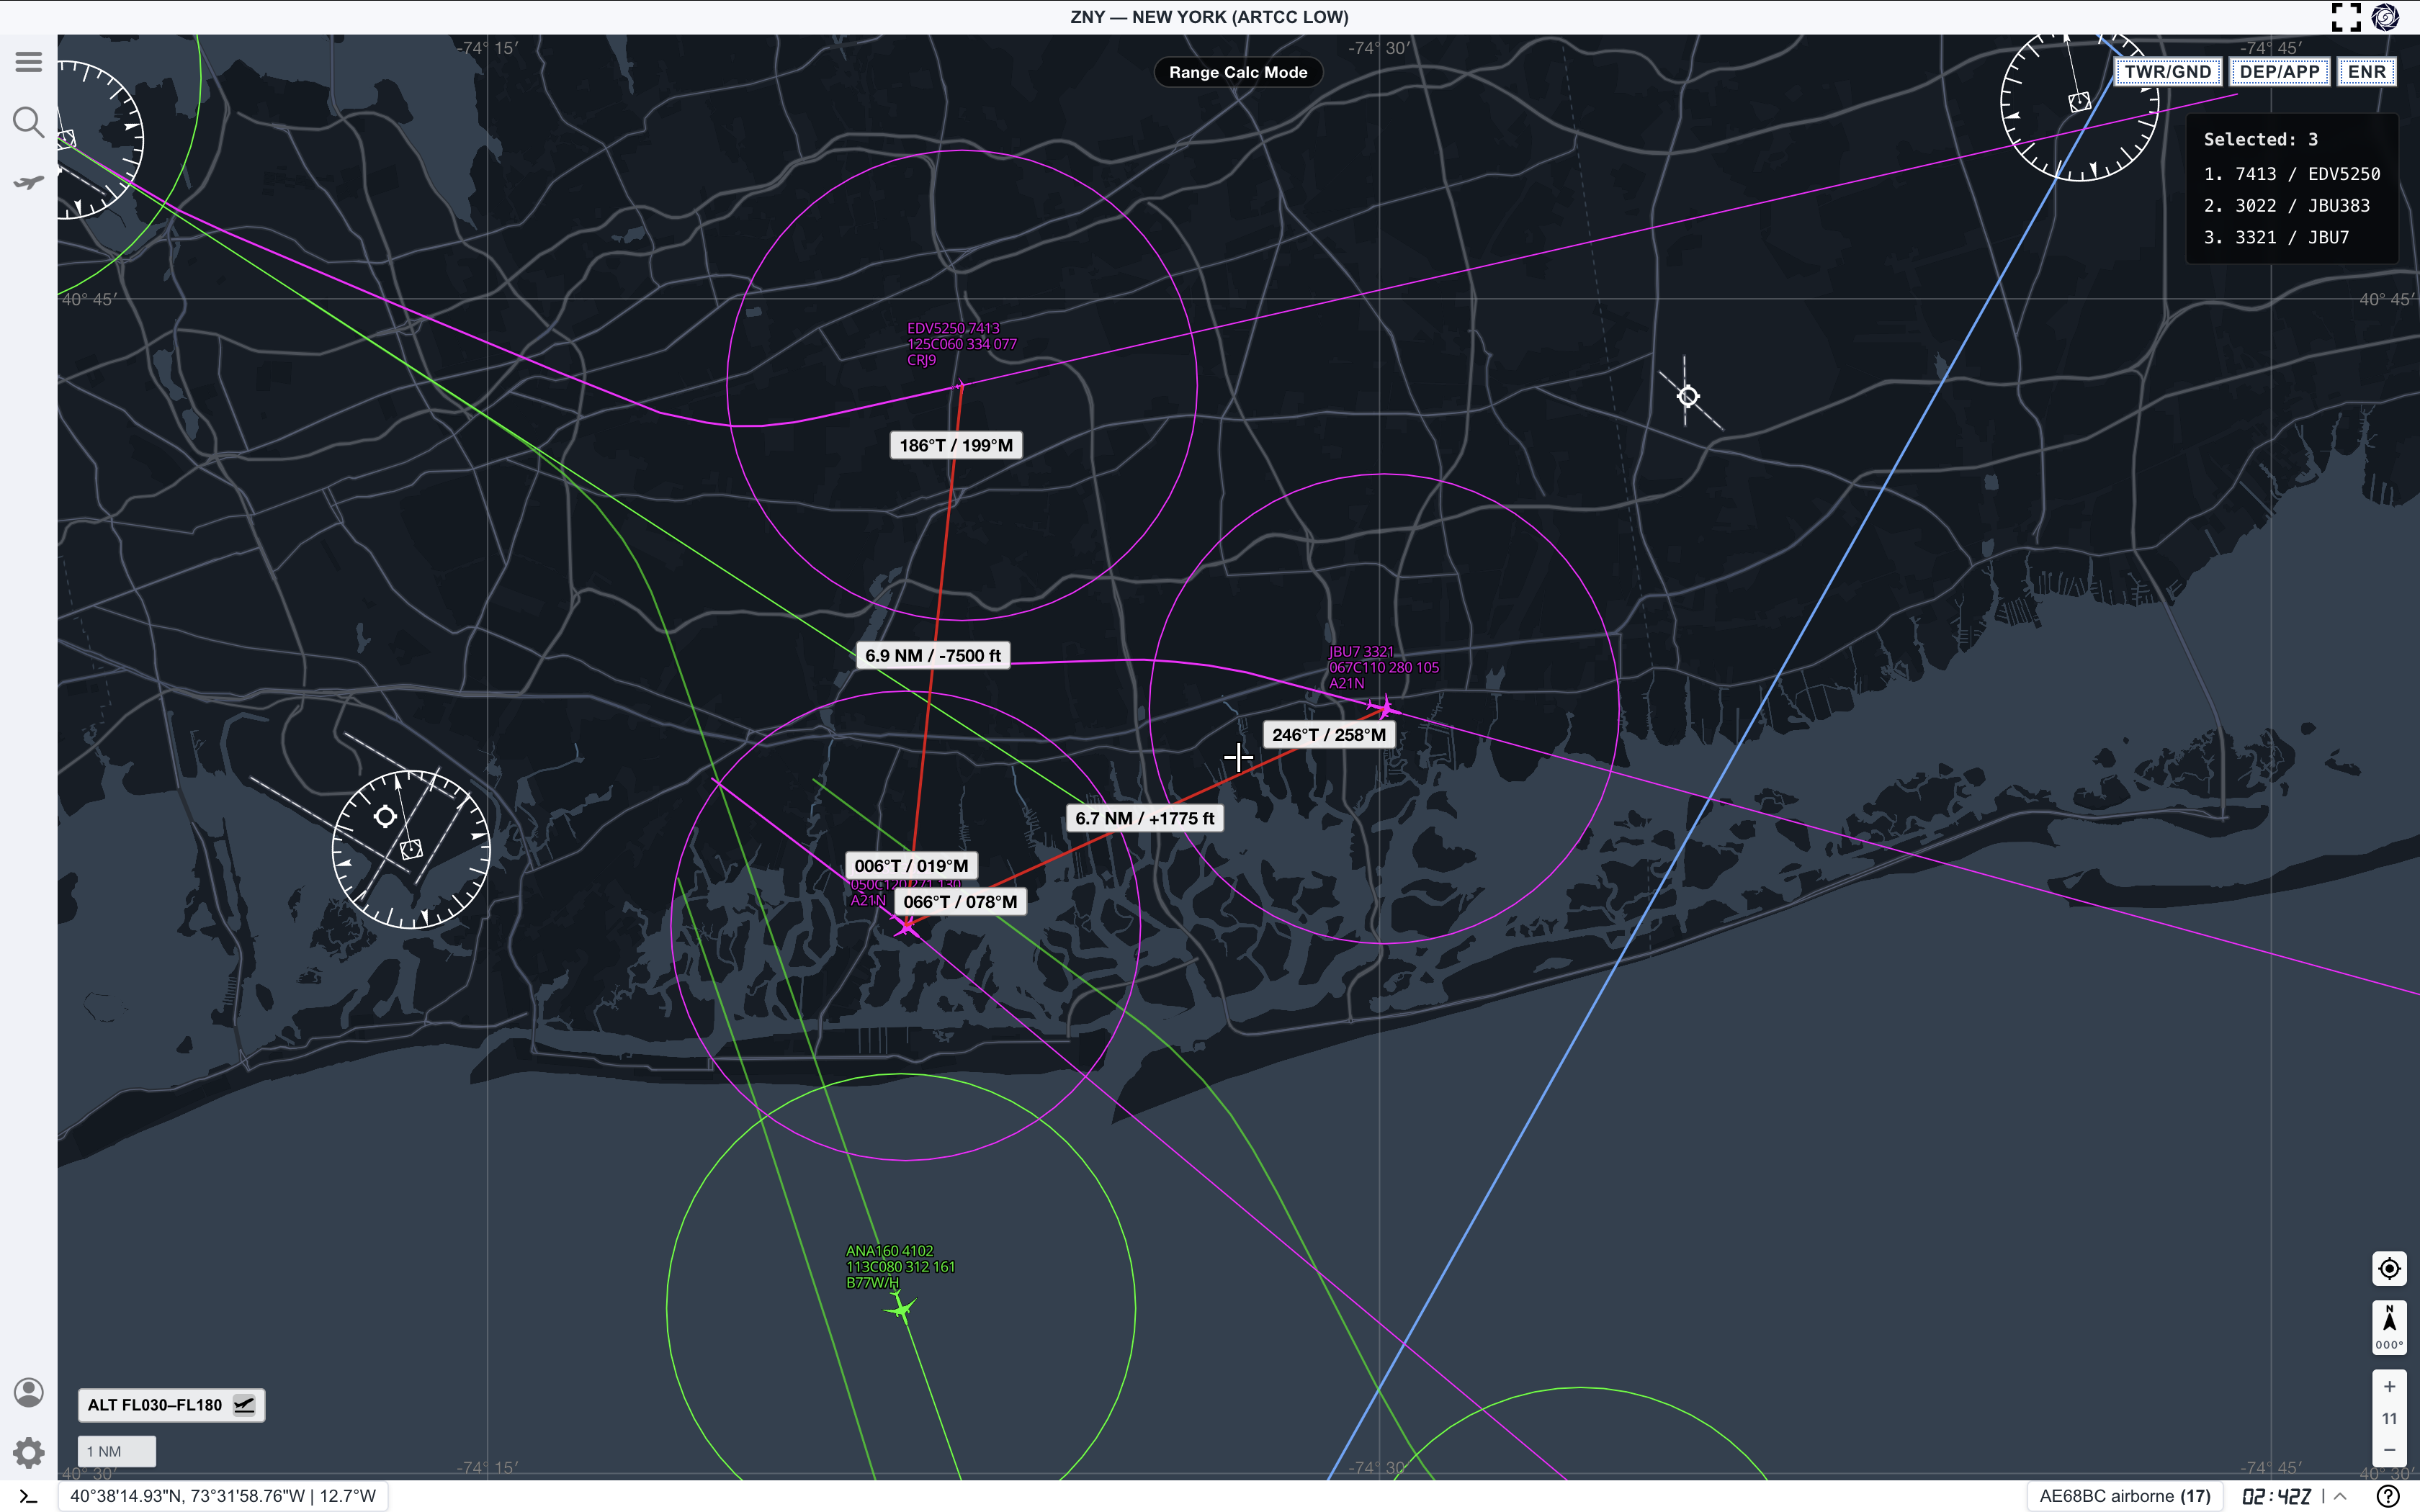
Use Range Calc Mode for quick checks:
- distance between selected aircraft
- spacing between traffic flows
- rough distance from a target to a fix, coast, airport, or visual reference
- altitude difference when the measurement label includes vertical separation
For a beginner workflow, one clean measurement is enough. Add more only when you can still read the map clearly.
Step 7. Check display toggles
The main menu exposes display controls such as Theater Mode, Gridlines, and Live Traffic.
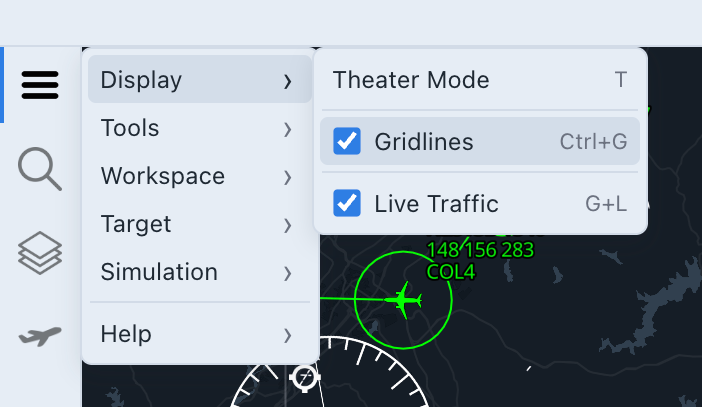
Use these sparingly:
- Keep
Live Trafficon for this guide. - Turn
Gridlineson when you need geographic orientation. - Use
Theater Modeonly when you want a focused map view.
If the map suddenly looks wrong, check these toggles before changing deeper settings.
Common mistakes
- Changing display, target, and workspace settings before learning the base flow
- Searching without confirming that live traffic is enabled
- Reading altitude or speed without checking track, vertical rate, and data freshness
- Forgetting that target details open automatically after selection
- Adding too many range measurements until the map becomes hard to read
Next step
After this quickstart:
- Repeat the search and selection flow with another target.
- Practice one Range Calc measurement, then clear it and make a cleaner one.
- Continue with AO Guide: Search and Select Aircraft.
- Read the latest product changes in Updates.